
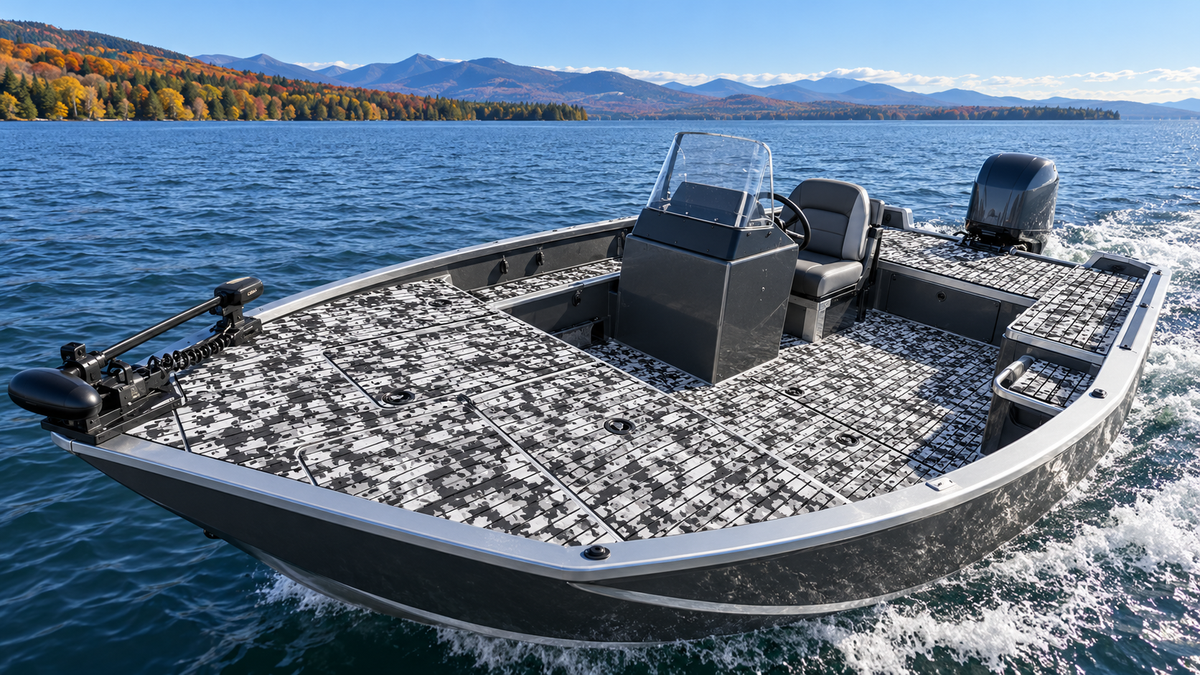
Straight-Groove vs. Diamond Boat Flooring Patterns
Choosing a boat-flooring pattern is not only a color decision. On an aluminum fishing boat, the surface design has to make visual sense across a raised casting deck, a narrow cockpit, several hatch lids, pedestal bases, drains, and a stern platform. A pattern that looks clear on one loose sheet can become busy, fragmented, or directionally confusing after it is divided into fitted panels.
This guide compares straight-groove and diamond-pattern sheet flooring as two different layout systems. It does not assume that either pattern is universally safer, easier to clean, or better performing. Those conclusions depend on the exact material, texture, construction, installation, contaminants, wear, and care instructions for the item you are considering. The useful question is narrower: which pattern helps you plan this particular boat more clearly?
Start with the deck map, not the sample
Before comparing patterns, sketch the boat as connected zones. Mark the bow casting deck, cockpit walkway, helm, passenger position, stern platform, boarding step, every moving lid, and every area that must remain accessible. Add fixed hardware such as consoles, seat bases, rails, drains, and fasteners. This map shows how often the flooring will be interrupted and where pattern direction will be most visible.
A broad uninterrupted deck field presents a pattern differently from a cockpit divided by six hatch lids. The right comparison therefore uses the same deck map for both options. If you compare one pattern on a clean rectangle and the other on the real boat, you are comparing presentations rather than layouts.
How straight grooves organize an aluminum fishing boat
Straight grooves create a strong directional line. You can run that line fore to aft, athwartship, or along a dominant passenger route, but the choice should stay deliberate across connected panels. Fore-to-aft orientation often gives the eye a continuous path through the boat. A different orientation can emphasize the width of a casting deck or distinguish a separate working zone.
That direction also makes small alignment errors easy to notice. A groove that changes angle at a hatch, seam, or cockpit transition can look accidental even when each individual panel fits. Build an orientation arrow into every paper template and photograph the complete dry fit before final placement. The related guide on aligning boat-flooring patterns across separate panels explains how to preserve a common reference line while keeping moving lids independent.
Questions to ask about a straight-groove layout
- What is the boat’s clearest visual axis: bow to stern, side to side, or along the main walkway?
- Can the same orientation continue across fixed deck fields and separate hatch panels?
- Will a narrow strip beside the console preserve the line, or make a small deviation more obvious?
- Where should the direction stop so a removable or serviceable panel remains visibly independent?
- Can every groove and panel edge remain reachable under the exact care instructions?
How a diamond pattern changes the visual rhythm
A diamond pattern gives the deck a repeated two-direction grid rather than one dominant line. That can reduce the visual importance of a single fore-to-aft axis, but scale matters. Large diamonds can become partial shapes on narrow strips and small lids. Small diamonds repeat more often, which may make separate panels feel connected, yet can also create a denser field around numerous pulls, fasteners, and cutouts.
The existing small-diamond versus large-diamond comparison focuses on choosing scale within the diamond family. For this decision, use that scale check after deciding whether a grid-based pattern belongs on the boat at all.
Questions to ask about a diamond layout
- How many complete repeats fit across the narrowest visible panel?
- Do hatch lids preserve the same registration as the surrounding deck when closed?
- Will round pedestal bases and pulls remain easy to distinguish against the repeated geometry?
- Does the pattern stay legible from normal standing height, not only in a close product photo?
- Can a future replacement panel be oriented and registered from the records you keep today?
Compare the two patterns with full-size mockups
Do not choose from a thumbnail alone. Print or draw a representative section of each pattern at the intended visible scale. Place the mockups on the bow deck, cockpit floor, and one hatch lid. View them in sun, shade, and the lighting in which you usually load or unload the boat. Add normal gear—a tackle bag, landing net, cooler, or life jackets—without covering the deck completely.
Next, tape full-size paper templates in place. Draw straight grooves as continuous parallel lines on one template set. Draw the diamond grid and repeat spacing on the other. Close every lid, walk the normal route, sit at the helm, and look back from the dock. This reveals whether the pattern supports the boat’s geometry or competes with it.
Use hatches and service access as the tie-breaker
Aluminum fishing boats often concentrate function in moving panels. Storage lids, battery access, livewell covers, and removable floor sections should not disappear into the design. Preserve clearance, hardware access, drainage paths, and the ability to lift each panel without disturbing its neighbor.
Straight grooves demand careful directional continuity at every lid. Diamonds demand careful registration and scale. Neither requirement is automatically simpler. Count the number of independent panels, then test the most difficult three: the smallest hatch, the lid with the most hardware, and the panel beside the narrowest walkway. The pattern that stays coherent across those three cases is usually the more manageable layout choice.
If your project includes ribs, fixed benches, or removable aluminum floor sections, review the planning sequence in installing jon-boat flooring around ribs and benches. The boat may differ, but the principle is useful: moving and serviceable structures control the panel plan.
Separate visible design from unverified performance claims
A photograph can verify color, visible pattern, groove direction, and broad panel layout. It cannot by itself establish traction, durability, adhesion, heat behavior, stain resistance, or compatibility with your substrate. Do not infer those properties from “grooved,” “diamond,” or other design names. Compare the exact item’s current documentation, preparation requirements, care guidance, backing, and compatibility before ordering.
Wet decks, residue, footwear, wear, and maintenance affect footing regardless of the visual pattern. Keep drains open, remove contaminants promptly, and follow the instructions for the exact material. Pattern choice can support a clear layout, but it does not replace good boat operation or maintenance.
Plan for cleaning and future panel replacement
Use the full-size mockup to identify edges, recesses, and hardware that may collect debris. Confirm that your normal brush, cloth, or other approved tool can reach the visible surface and panel boundaries. Avoid assuming that one pattern is easier to clean simply because its geometry looks simpler. The exact texture and approved care process matter more than the pattern name.
Also create a replacement record before final placement. Photograph each dry-fitted panel, note its orientation, label the templates, and keep measurements for hatch lids and small strips. Straight grooves need a saved direction line; diamonds need a saved registration point and repeat scale. Good records make a future isolated repair easier to plan without redesigning the whole deck.
A practical decision worksheet
- Map every fixed, moving, wet-entry, drainage, and service zone.
- Choose one reference axis for the whole boat.
- Mock up straight grooves and diamonds at realistic visible scale.
- Test both options across the three hardest panels.
- Check the layout from the dock, helm, bow, and stern.
- Add normal gear and repeat the visibility check.
- Confirm exact-item documentation instead of inferring performance from the pattern.
- Save oriented templates and photographs for future work.
Practical takeaway
Choose straight grooves when a deliberate directional line helps organize the boat and you can maintain that orientation across every important panel. Choose diamonds when a repeating grid fits the deck’s proportions and remains readable across hatches, narrow strips, and hardware. If both work, let the most interrupted part of the boat—not the largest open panel—decide.
When comparing Focean flooring, start with the verified current collection, then confirm the exact item’s surface, dimensions, backing, compatibility, preparation, installation, and care information. Use full-size templates, dry-fit the complete panel sequence, and keep every hatch, drain, fastener, and service point accessible.
Share:
How to Plan Pilothouse Cruiser Flooring Around Cabin Doorways
Pontoon Flooring for Dockside Boarding and Loading