
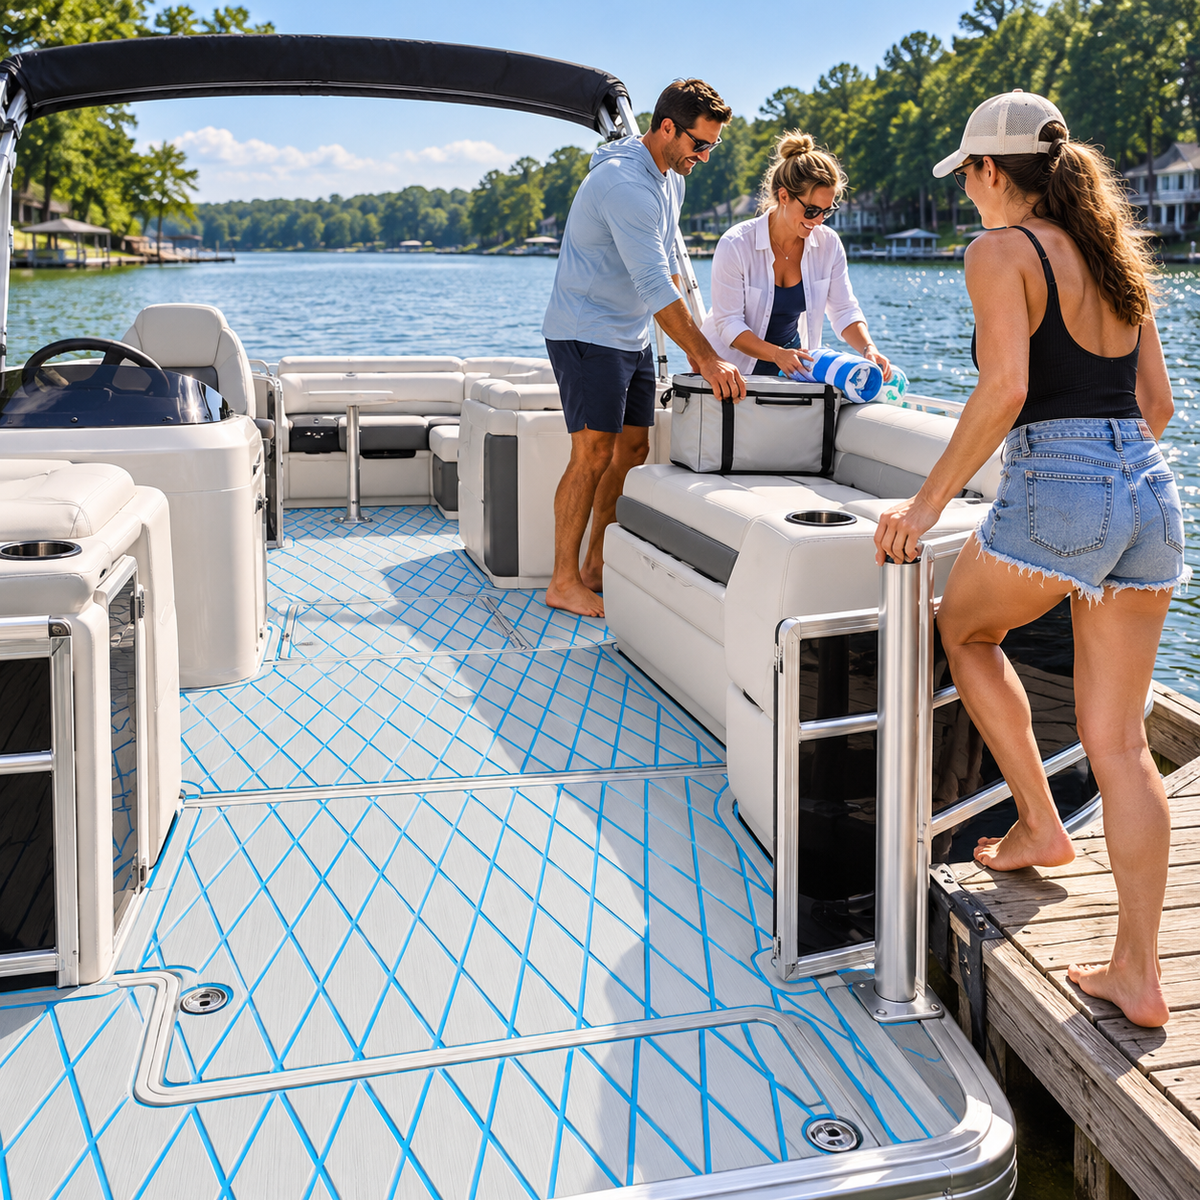
Pontoon Flooring for Dockside Boarding and Loading
A pontoon deck can feel open when it is empty and crowded the moment coolers, towels, water toys, and several people arrive at the same gate. That makes dockside boarding a useful flooring-planning test. The goal is not to make a universal safety promise. It is to create a readable route, keep moving parts accessible, and avoid turning the first few feet of deck into an unplanned storage area.
This guide shows how to map that load-in and load-out sequence before choosing or cutting sheet-material boat flooring. It focuses on the gate landing, temporary gear staging, lounge and helm routes, hatches, table bases, drains, and the return trip to the dock.
Start with the complete dock-to-seat sequence
Do not begin with a flooring sample. Begin with a normal departure. Write down who steps aboard first, where each person pauses, which handholds they use, and what they carry. Then repeat the exercise for the last person aboard, when the deck already contains bags and loose gear.
A useful route map should include the dock edge, gate opening, first stable standing area, nearest seat, helm path, and any turn needed to reach the bow or stern lounge. Mark objects that change the route, including a removable table, cooler, pet gear, dock lines, and water toys. This sequence reveals conflicts that an empty-deck measurement will miss.
Treat the boarding gate as a landing zone
The gate is more than an opening in the rail. It is a transition between two surfaces, two heights, and two moving environments. Keep its full swing, latch, hinges, threshold, and surrounding hardware visible on the plan. Flooring edges should not hide the condition of these parts or interfere with their movement.
Outline the first two or three comfortable foot placements inside the gate. Check the route with the gate fully open and with a person carrying a realistic bag. Texture can be one part of a footing plan, but it does not make wet, contaminated, worn, or obstructed surfaces slip-proof. Footwear, water, residue, lighting, handholds, and deck condition still matter.
Create a temporary staging area that is not the walkway
Many boarding problems begin when the first cooler or tote is set down in the only clear lane. Choose a temporary staging rectangle beside the route rather than inside it. The area should be large enough for the gear normally carried aboard, but it should not cover a hatch, drain, seat base, gate latch, or service point.
Test the staging area in two states: while people are still boarding and after the boat is fully loaded. If the same rectangle becomes a seating footwell or helm approach, give every staged item a final destination. A load-in plan is incomplete if gear has nowhere to go after the gate closes.
Map the route around furniture and table bases
Pontoon lounges create soft curves, while the usable walking lane often narrows around seat corners, consoles, and pedestal tables. Trace the actual free floor instead of estimating from the boat's overall length and width. Note where knees, feet, bags, and opening seat bases temporarily occupy the aisle.
A removable table deserves special attention. Map both the table-in and table-out configurations, including the pedestal socket and the place where the table is stored. The flooring layout should keep the socket and nearby fasteners inspectable. Do not use a decorative pattern to disguise hardware that owners need to find quickly.
Keep every hatch and access panel independent
Boarding gear often lands on the first convenient lid. Identify every moving hatch, storage seat, fuel or electrical access point, and removable deck panel before planning seams. Open each one through its complete travel while the gate is open and the staging area is loaded.
Give moving parts their own templates and panel boundaries. Do not bridge a seam from a fixed deck area across a lid. Label each paper template with orientation, hinge side, neighboring panel, and hardware location. That record helps during dry fitting and makes a future isolated panel replacement easier to understand.
Preserve drains and visible water routes
Dockside loading can bring wet footwear, dripping towels, or lake water onto the deck. Map drains, scuppers, low points, channels, and openings exactly as they exist. Confirm that planned panel edges do not cover them or make routine inspection difficult.
Use only enough water during a mock cleanup to observe where it naturally travels, and follow the boat builder's care guidance. If water collects behind furniture, around a hatch frame, or beside the gate, revise the panel map and cleaning access before treating the layout as final.
Use pattern direction to make the route readable
A pattern can help organize the deck visually, but it should not be treated as a performance claim. Choose one dominant direction for the main walking lane, then decide deliberately how the pattern meets independent hatch panels and curved lounge boundaries. Avoid small slivers whose only purpose is to force a visual continuation.
Print or draw the pattern at realistic scale and place it over full-size paper templates. View it from the dock, the gate, the helm, and both lounge areas. A layout that looks balanced in a close-up sample can feel busy when repeated across a large social deck.
Rehearse boarding with a loaded, dry-fit deck
Before placement, dry-fit every labeled template or removable test panel. Rehearse a realistic departure with the boat secured at the dock and under the responsible operator's control. Use empty or lightly loaded stand-ins for coolers and bags rather than creating an unnecessary handling risk.
Watch for four kinds of conflict:
- Route conflicts: people must step around staged gear or each other.
- Motion conflicts: a gate, lid, seat base, or table cannot move freely.
- Access conflicts: a drain, fastener, or service point becomes hidden.
- Visual conflicts: pattern direction or panel seams make separate zones hard to read.
Repeat the check in reverse for unloading. The return trip may include wet gear, tired passengers, and items removed in a different order. Revise the deck map until both directions work without relying on a temporary pile in the walkway.
Questions to settle before ordering or cutting
Use the finished route map to ask exact-item questions. Confirm the selected sheet material's dimensions, backing, substrate compatibility, surface-preparation instructions, cutting method, placement process, care guidance, and current commercial terms from primary documentation. If the substrate condition or installation method is uncertain, pause and get product-specific guidance rather than filling the gap with a general assumption.
When reviewing Focean sheet-material options, bring the labeled deck map, full-size templates, and photographs of gates, hatches, drains, table sockets, and transitions. That keeps the conversation tied to the actual boat instead of a generic pontoon outline. You can also review Focean's pontoon comfort planning guide, custom pontoon layout guide, and post-lake-day cleaning guide. For current items, use the verified Focean collection and confirm the details for the exact option you are considering.
Practical takeaway
Plan pontoon flooring around the boarding sequence, not just the empty deck. Define a clear gate landing, move temporary gear beside the route, preserve every hatch and drain, map both table configurations, and rehearse loading and unloading with full-size templates. A good plan makes the deck easier to understand and maintain without asking texture or pattern to solve every footing problem.
Share:
Straight-Groove vs. Diamond Boat Flooring Patterns