
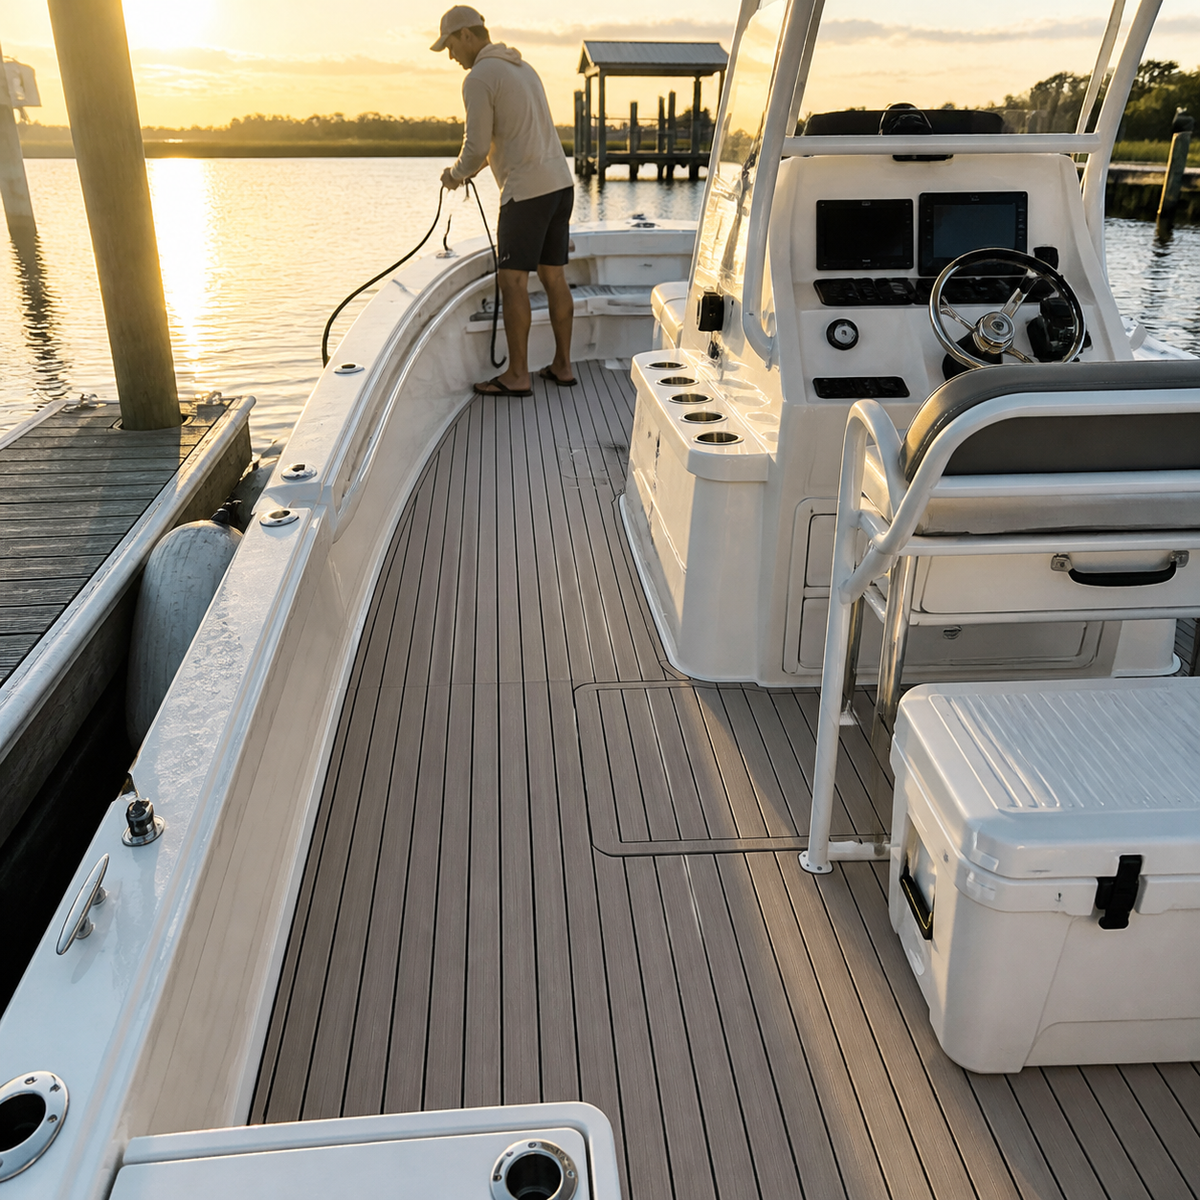
A saltwater trip leaves more than one kind of mess on a center-console deck. Spray dries along open walkways, bait and food residue collect near work areas, and damp gear can hide debris beside the console, cooler, and hatch edges. A quick rinse may improve the appearance, but it can also move contamination into grooves and boundaries that are harder to inspect later.
This guide gives boat owners a zone-by-zone routine for cleaning sheet-material flooring after a saltwater outing. It is designed to keep drains, hatches, hardware, and access points visible while helping you choose the mildest effective method. Always identify the exact flooring first and follow its current care instructions; products that look similar can require different cleaners, tools, or drying steps.
Begin with a dry deck map
Before adding water, walk from the stern to the bow and note where the trip left residue. Divide the deck into practical zones: boarding area, aft cockpit, console sides, helm, bow walkway, cooler or seat footprints, and hatch boundaries. This prevents the rinse from carrying a concentrated mess across areas that were already clean.
Remove rods, bags, footwear, loose cushions, buckets, and portable coolers. Lift only the panels or equipment that the boat and flooring instructions allow you to move. Sweep or vacuum loose grit with a suitable non-damaging tool. Dry removal matters because sand, shell fragments, and other hard particles can be dragged across the surface during wet scrubbing.
Photograph any lifted edge, damaged seam, unusual discoloration, blocked drain, or loose hardware before cleaning. Cleaning should not disguise a condition that needs inspection. If a boundary looks uncertain, keep aggressive tools and concentrated products away from it until you know how the exact system should be handled.
Identify the flooring and current care instructions
Do not choose a cleaner from the boat type alone. Confirm whether the surface is EVA foam, marine vinyl, carpet, molded fiberglass, or another material, and identify any neighboring surfaces that could be affected by runoff. Look for the manufacturer or seller's instructions for dilution, dwell time, brush type, rinsing, drying, and products to avoid.
If you are still evaluating flooring categories, Focean's center-console flooring comparison explains how EVA foam and marine vinyl differ in seams, access, cleaning routines, and repair planning. Use that background to identify the questions that apply to your installed surface, not as a substitute for exact-product guidance.
Use a controlled stern-to-bow rinse
Check that intended drainage paths are open before rinsing. Start with a gentle flow in the dirtiest working zone and watch where the water travels. Keep runoff moving toward the boat's designed outlets rather than under portable equipment, into storage areas, or across a threshold that should stay dry.
Work in small sections. A controlled rinse lets you see whether loose debris is leaving the grooves or simply relocating. Around electronics, switches, openings, upholstery, and hardware, follow the boat builder's care guidance and avoid directing water where it does not belong. The goal is to remove loose salt and trip debris without turning a deck cleanup into a full-boat soak.
Clean the aft cockpit as a work zone
The aft cockpit often receives the heaviest mix of footwear traffic, fishing activity, dock debris, and wet gear. After the initial rinse, apply only a cleaner that the exact flooring instructions permit. Use the stated dilution and begin with a small, inconspicuous test area if the guidance calls for one.
Agitate gently in the direction that helps lift debris from the visible texture. Do not assume that harder scrubbing or a stronger mixture will produce a better result. Give concentrated spots separate attention instead of repeatedly scrubbing the entire cockpit. Rinse the section completely before cleaner can migrate or dry along seams and edges.
Detail the console base and side passages
Center-console boats create narrow traffic lanes where residue gathers beside the console, leaning posts, seat bases, and vertical transitions. Use a small suitable brush or cloth to reach these boundaries without forcing debris beneath an edge. Keep fasteners, inspection plates, and removable panels recognizable.
Work from the vertical boundary outward. This makes it easier to see what is leaving the corner and reduces the chance of pushing grit back into it. If a seam remains dark after normal cleaning, stop and inspect it in good light. The cause may be trapped debris, staining, shadow, or a boundary condition; guessing with a harsher chemical can make diagnosis harder.
Reset cooler, seat, and gear footprints
Portable equipment can trap moisture and hide a sharp outline of dirt. Move one item at a time, clean its deck footprint, and inspect the underside of the item before returning it. A clean deck can be immediately re-soiled by a cooler base, tackle bag, or bucket that still carries grit.
Pay attention to tie-down points and corners where straps rest. Keep attachment hardware clear, and do not cover a wet area with gear simply because the exposed surface looks dry. Leave the footprint open long enough to inspect the flooring edge and surrounding deck.
Treat hatch edges and drains as inspection points
Hatch perimeters, pull recesses, gutters, and drains should remain functional and easy to locate. Clean around them with a controlled amount of water and the mild method allowed for the surface. Avoid packing foam, cloth fibers, or loosened debris into an opening while detailing it.
Open hatches only when it is appropriate for the boat and the contents are protected. Inspect gutters and channels separately from the visible flooring panel. If water does not follow the expected route, pause the wash and find the obstruction or low point rather than adding more flow.
For a broader layout view, the center-console installation planning guide shows how console bases, hatches, hardware, panel maps, and drainage should be considered before flooring is fitted. Those same boundaries deserve attention during every cleanup.
Handle trip residue by source
Different residues call for different responses. Loose salt and ordinary spray may release during the controlled fresh-water rinse. Food, bait, fish residue, sunscreen, fuel or oil, rust-colored marks, and unknown stains should not all receive the same treatment. Identify the likely source, consult the flooring instructions, and use only a permitted approach for that residue.
Act promptly when practical, but do not improvise with mixed household chemicals, abrasive pads, solvents, or high-pressure equipment. If the source is unknown or the mark remains after the approved routine, document it and ask the flooring seller for guidance. A slower, specific answer is more useful than an aggressive experiment that changes the surface.
Rinse, dry, and inspect before loading the boat
Complete a final low-flow rinse from the cleaned zones toward the intended drains. Look for soap remaining in grooves, under movable gear positions, beside the console, and around hatch pulls. Check neighboring surfaces as well; runoff can carry residue beyond the flooring.
Allow the deck and hidden footprints to dry according to the relevant instructions before replacing gear or closing a cover. Ventilate storage spaces that were opened. Once dry, repeat the stern-to-bow walk and record any seam, edge, drain, or stain that needs follow-up.
Comfort and movement also affect where a deck gets dirty. Focean's center-console standing-zone guide can help you map helm, side-passage, cockpit, and bow traffic. Add the heaviest-use locations from that map to your regular care checklist.
Build a repeatable post-trip checklist
A useful routine is short enough to follow but specific enough to reveal changes. Keep this sequence with the boat:
- Unload movable gear and remove dry debris.
- Confirm the flooring type, permitted cleaner, and open drainage route.
- Photograph damage or unusual marks before washing.
- Rinse and clean the aft work zone in small sections.
- Detail console sides, equipment footprints, hatch edges, and drains.
- Treat residue by source using only an approved method.
- Rinse completely, dry open areas, and perform a final inspection.
Keep notes when a stain returns, an edge changes, or a drain repeatedly slows. That history helps separate a one-time mess from a maintenance issue that deserves product-specific advice.
FAQ
Can I pressure-wash center-console boat flooring?
Do not assume so. High pressure can affect surfaces, edges, seams, nearby hardware, and other boat components. Follow the exact flooring and boat-care instructions; when they are unclear, use a gentler controlled method and ask the supplier before escalating.
What should I do if salt residue remains in textured grooves?
Repeat the permitted mild cleaning process in a small section, using a suitable tool that reaches the texture without damaging it. Rinse completely and inspect after drying. Avoid increasing chemical strength or abrasion without exact guidance.
Should I put the cooler and gear back as soon as the deck looks dry?
Check the hidden footprints, item undersides, seams, and adjacent edges first. A surface can appear dry while moisture or grit remains under equipment. Follow the relevant drying instructions before reloading or covering the boat.
Practical takeaway
Cleaning center-console boat flooring after a saltwater trip works best as a mapped inspection routine, not a hurried all-deck scrub. Remove dry grit, control the rinse, clean each functional zone, preserve access and drainage, and escalate stubborn residue only with exact-product guidance. If you need help identifying the questions for a particular Focean listing, contact Focean with clear deck photographs, the installed surface or listing, and the area you are trying to clean.
Share:
Boat Flooring Around Sailboat Companionways: A Buyer’s Guide
How to Plan EVA Foam Flooring Installation on a Cruising Catamaran