
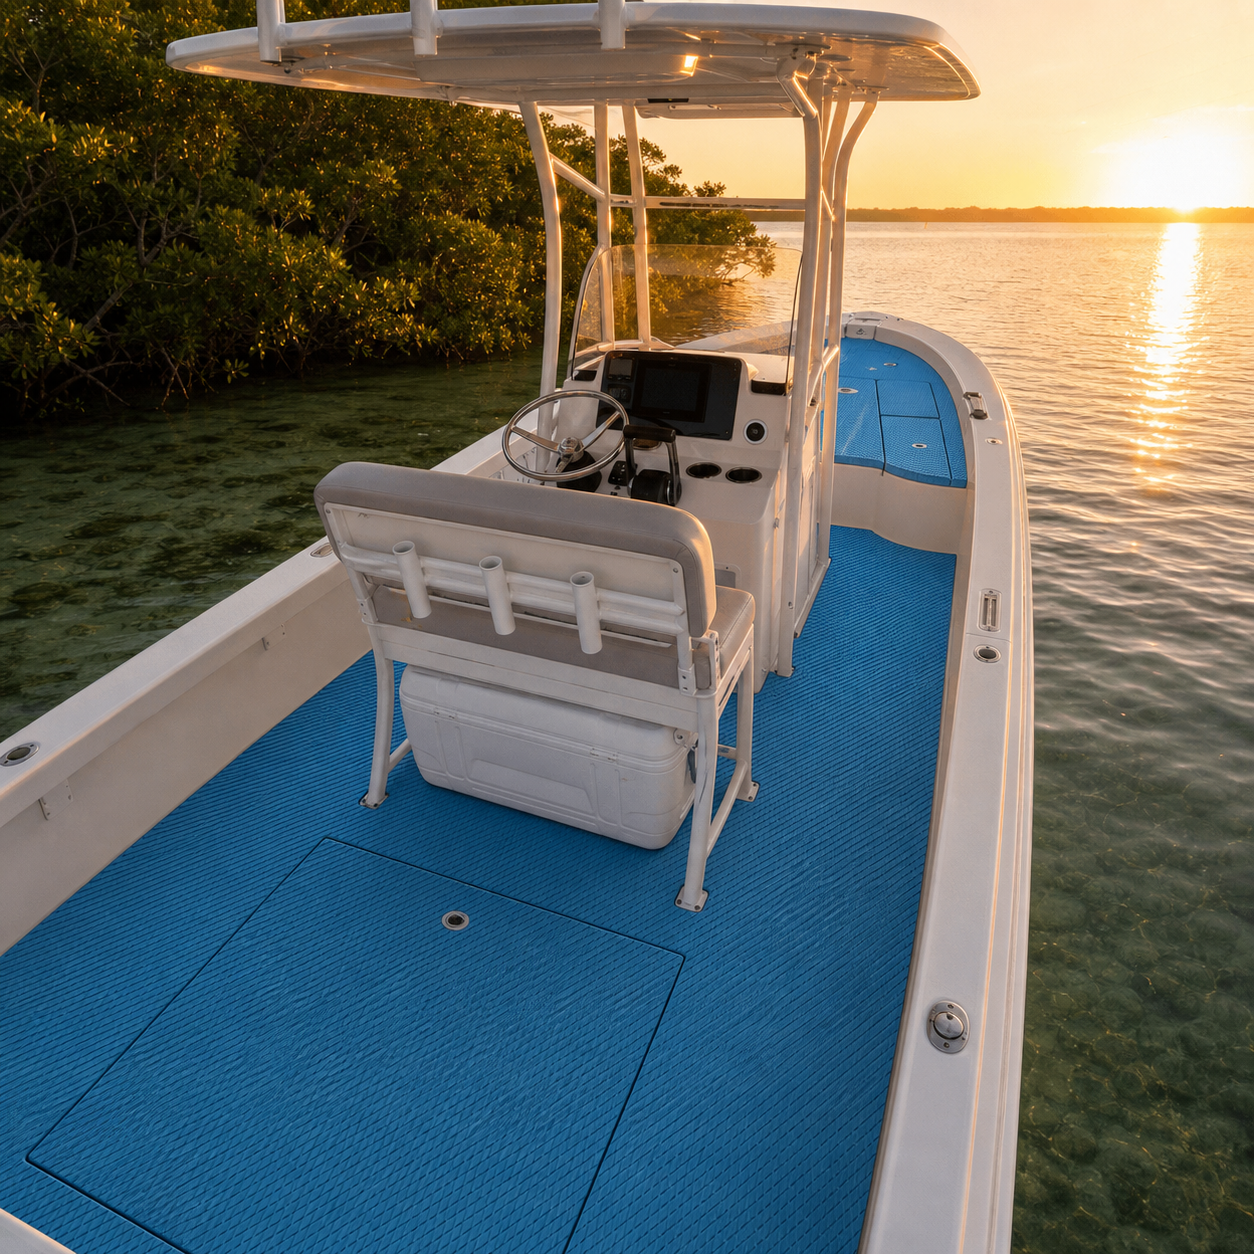
A center-console boat creates a deceptively complex flooring project. The cockpit may look open, but the deck is interrupted by hatches, seat bases, console supports, drains, rod holders, inspection plates, and narrow walkways. A successful upgrade depends less on cutting quickly and more on building an accurate plan before any flooring is bonded.
This consumer guide explains how to plan an EVA foam flooring installation for a center-console fishing boat. It focuses on layout, templates, dry fitting, surface preparation, and sensible checks around marine systems. Product instructions and the boat builder’s service guidance always take priority. If the deck is soft, leaking, cracked, or structurally questionable, repair that problem before treating flooring as a finish layer.
Start with the way you use the boat
Before measuring, walk through a normal day on the water. Where do anglers stand while casting? Which hatch opens most often? Where do coolers, tackle bags, and landing nets move across the deck? Which path connects the helm, bow, transom, and boarding point?
These movements help you decide where seams should—and should not—go. Avoid placing a tiny filler piece in a busy standing area or directly beside a frequently opened hatch. Try to keep large visual fields calm while preserving every drain, latch, fastener, and service opening. Flooring should support the deck’s function, not disguise or restrict it.
Make a simple sketch and give each zone a name, such as bow platform, port walkway, helm, aft cockpit, or transom step. Use those labels from measuring through installation.
Inspect the substrate before planning panels
New flooring needs a sound, stable base. Look for movement underfoot, loose hardware, raised repairs, old adhesive, cracked coatings, corrosion, trapped moisture, and edges that flex. Open every compartment and inspect the underside where possible. Confirm that water can still reach drains and that hatch channels are clear.
Do not bridge a moving joint or cover damage that needs monitoring. If inspection reveals a structural or marine-system issue, use a qualified repair professional.
Also identify the substrate material and existing finish. Cleaning and bonding requirements can differ, so confirm compatibility for the exact flooring, adhesive system, and deck surface before proceeding. Avoid making assumptions based only on how the surface looks.
Choose a reference line that belongs to the boat
Center consoles are not always as symmetrical as they appear. A console face, leaning post, or old repair edge may sit slightly off the true centerline. If every panel follows an imperfect component, the pattern can drift across long deck runs.
Establish a reliable fore-and-aft reference using fixed points on the boat, then verify it from more than one location. Mark temporary cross references at major zones. These lines create a shared coordinate system for templates, grain direction, routed patterns, and seams.
Decide whether the visible pattern will run fore and aft, athwartship, or change direction intentionally in a separate zone. View the plan from the stern and bow. A layout that fits on paper may still look unbalanced from the normal boarding angle.
Build a panel map before making templates
Divide the deck into practical pieces. Panel boundaries often work best along existing transitions, hatch outlines, console edges, or other visual breaks. Keep narrow strips to a minimum, and avoid creating sharp internal corners that are difficult to cut and align.
Each panel should have a unique code and an arrow pointing toward the bow. Note neighboring panels and intended seams. This map prevents mirrored cuts and supports a controlled installation order.
Think about future service as well. Inspection plates, fuel-system access, wiring routes, pumps, and removable hardware must remain accessible. Never cover a label, opening, or fastener that may be needed for safe operation or maintenance. When in doubt, consult the boat builder or a marine technician.
Template one zone at a time
Use paper or suitable template film that lies flat without stretching. Secure it gently, then trace the perimeter and every relevant obstacle. Mark the bow direction, panel code, top face, reference lines, and adjoining seam edges directly on the template.
For a hatch, record both the lid and the surrounding frame. Check hinge movement, latch access, drainage channels, and clearance when the lid swings. For console supports or seat bases, decide whether the flooring ends neatly around the hardware or whether the component can be removed and reinstalled correctly. Do not disconnect steering, electrical, fuel, or structural components simply to simplify a template.
Trim the template conservatively and return it to the deck several times. It should lie flat without buckling or forcing its way around corners. Mark any planned edge allowance only after checking the flooring manufacturer’s instructions.
Make a test piece for the hardest detail
Before transferring the entire deck, identify the most demanding feature: perhaps a curved bow edge, a group of console supports, or a hatch with tight clearance. Re-create that area in inexpensive scrap template material and test the geometry.
This rehearsal reveals whether your measuring method is consistent. It also helps determine how the finished pattern meets the hardware. Solving one difficult detail early is more useful than producing a full set of templates that repeat the same error.
Transfer the layout without flipping it
Template orientation is a common source of expensive mistakes. Before tracing, compare the bow arrow, top-face label, and pattern direction on the flooring. If you turn a sheet over to cut from the back, the template may need to be mirrored. Pause and confirm with the panel map instead of relying on memory.
Keep every template from shifting. Trace cleanly, label the transferred outline, and mark which edges meet neighboring panels. Use a sharp blade on a protected, stable cutting surface. Several controlled passes usually produce a cleaner line than forcing a dull blade through the material. Keep hands away from the cutting path and change blades when cuts begin to drag.
Leave small hardware openings conservative until the panel has been checked on the boat. Material can be removed during refinement, but an oversized opening cannot be reversed.
Dry-fit the complete deck
Place all cut panels with their release liners intact. Do not evaluate one piece in isolation. Check the whole visual field from the stern, bow, helm, and both walkways. Confirm pattern direction, seam spacing, edge relationships, and panel order.
Operate every hatch and latch. Verify that drains, deck plates, tie-downs, rod-storage openings, and service points remain usable. Look for corners that lift, panels that must be stretched to fit, or seams that gradually wander away from the reference line. A panel should rest naturally in position; stretching it into place can distort the layout.
Use removable tape marks across adjoining panels to preserve alignment. Photograph the final dry fit and update the panel map if anything changed. Only move to surface preparation when the entire set passes this check.
Prepare a clean, dry bonding surface
Remove the panels in labeled order. Vacuum loose debris, then prepare the substrate exactly as directed for the chosen flooring and adhesive. Dust, wax, polish, silicone residue, oil, old glue, and incompatible cleaner residue can all interfere with bonding.
Use only preparation products approved for the materials involved. Let the deck dry fully and follow the stated environmental conditions. Windblown dust, moisture, or an unsuitable deck temperature can undo careful template work. Keep foot traffic and loose gear away from the cleaned area.
If the instructions call for a small adhesion test, complete it in a discreet location and evaluate it before committing to the full deck. Do not invent a cure schedule; follow the current directions for the selected product.
Install in a sequence that protects alignment
Begin with a panel tied to your strongest reference marks. Expose only a manageable portion of the adhesive liner, position that edge, and check alignment again before applying firm pressure. Continue gradually, smoothing from the anchored area toward open edges according to the product instructions.
Do not peel a large liner all at once or pull the foam to reach an obstacle. Install neighboring panels from the shared reference system, not merely from the edge of the last piece. This prevents a small error from multiplying across the cockpit.
Pay close attention to perimeter edges, seams, hatch borders, and narrow sections. Reinstall removed hardware only with the correct sealing method and service procedure. Avoid crushing or twisting the flooring beneath a base, and never guess at fastener requirements.
Common planning mistakes on center-console boats
- Using the console as the only guide: it may not define the boat’s true centerline.
- Template creep: errors accumulate when each new panel is traced from the last instead of fixed references.
- Ignoring hatch movement: a lid can fit while closed but bind when opened.
- Covering service points: a cleaner visual is not worth losing maintenance access.
- Cutting before choosing pattern direction: rotated panels can look inconsistent even when their outlines fit.
- Bonding over residue: a visibly clean deck can still carry wax, oil, or incompatible cleaner.
- Working around marine systems casually: steering, wiring, fuel components, and structural hardware require appropriate expertise.
FAQ about center-console flooring installation
Can I make templates while the boat is in the water?
A stable, dry working position makes measuring and dry fitting easier. Movement, spray, and limited access can reduce accuracy. Choose a secure setting that lets you open hatches, reach every zone, and keep template material flat.
Should flooring cover hatch lids?
It can be planned around removable lids when the product and clearances allow, but hinges, latches, gutters, and service access must continue to work. Template the lid and frame as separate functional parts rather than treating them as one uninterrupted field.
What if the port and starboard sides are slightly different?
Template both sides. Mirroring one side may save time, but small differences in hardware, repairs, or molding can create a poor fit. Independent templates are the safer choice when symmetry has not been confirmed.
When should I hire an installer?
Professional help is appropriate when the substrate needs repair, components must be disconnected, the layout requires precision scanning, or you are unsure how to preserve access and sealing around marine systems.
Practical takeaway
The most important installation work happens before bonding: understand traffic paths, inspect the deck, establish reliable reference lines, map the panels, refine full-size templates, and dry-fit everything together. A deliberate plan protects both appearance and access to the systems that keep the boat usable.
Focean can be one place to review current EVA foam flooring options while you build that plan. Confirm the dimensions, backing, compatibility, pattern direction, and current terms for the exact item you are considering before ordering or cutting.
Ready to map your deck? Visit Focean to compare current flooring information, then use the panel-map and dry-fit process above to prepare questions for the supplier or installer.
Share:
How to Clean EVA Foam Flooring on a Wake Boat
EVA Foam vs. Marine Vinyl for Skiffs: A Practical Flooring Guide