
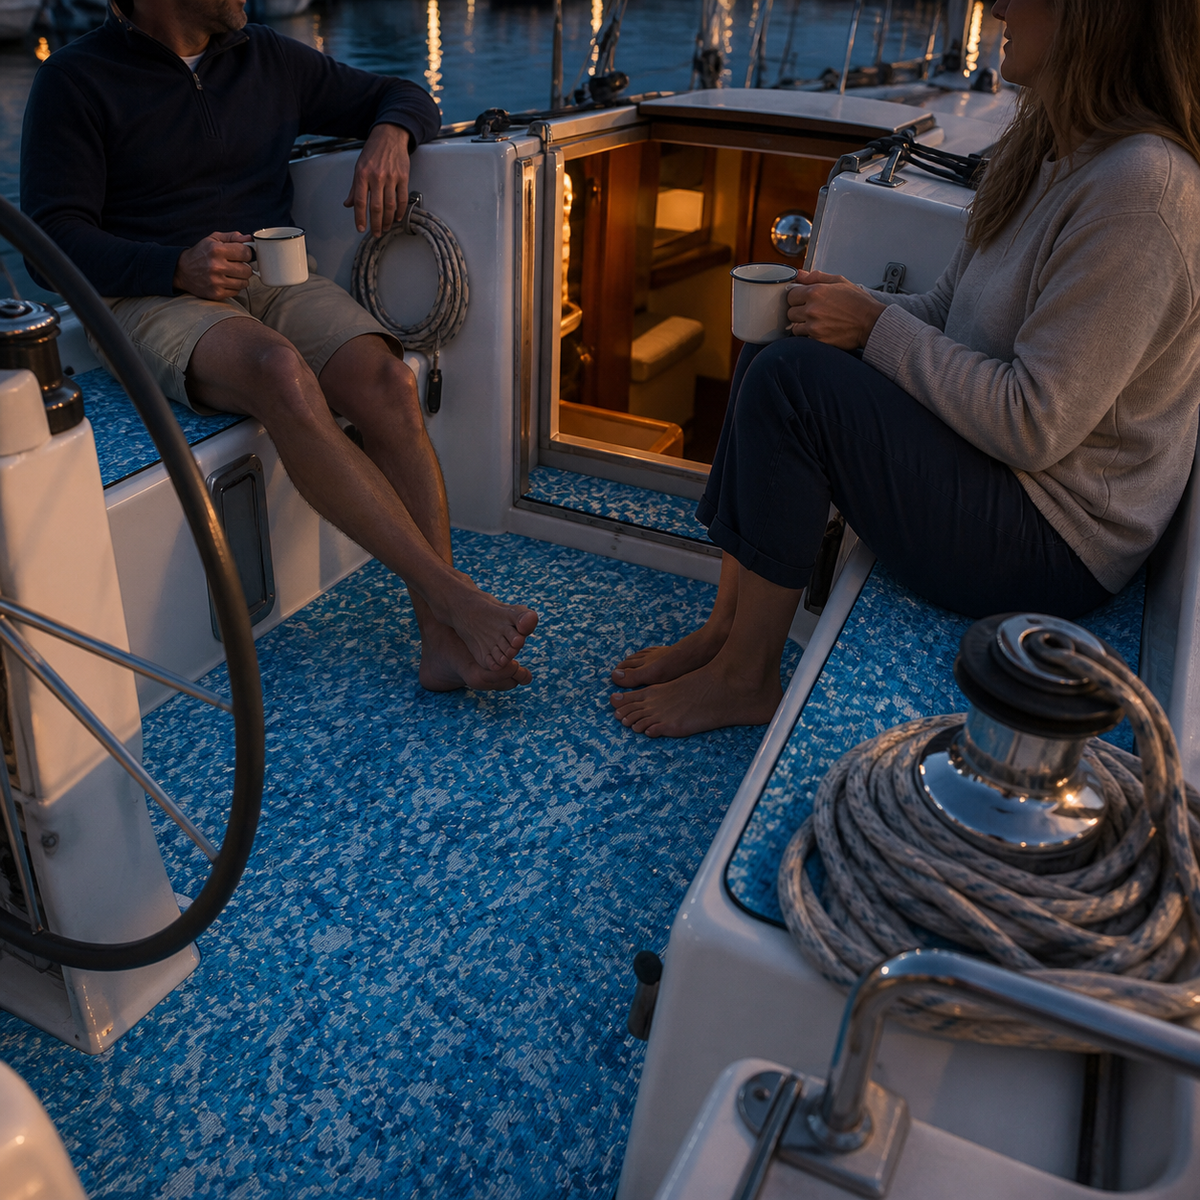
Buying flooring for a sailboat cockpit is not only a material choice. The cockpit is a compact working area where the companionway, lockers, drains, winches, sheets, and helm all compete for space. A surface that looks appealing in a product photo can become awkward if it obscures a step, crowds a hatch edge, or creates a poorly planned transition at the cabin entrance.
This guide helps you evaluate sheet-material flooring before ordering. It focuses on the companionway and the working zones around it, where layout decisions are easiest to get wrong. Use it to build a deck map, compare candidates consistently, and prepare exact-product questions for the seller. Always confirm compatibility, preparation, and care instructions for the particular flooring and deck surface you are considering.
Start with the companionway, not the color
The companionway is the visual and physical center of many sailboat cockpits. Crew move through it, loose gear passes across it, and water can collect near its threshold. Before comparing colors or patterns, photograph the entrance from the cockpit and cabin. Record the sill, vertical faces, nearby drains, sliding hatch path, handholds, and any removable boards or doors.
Decide where the flooring should stop. A clean termination may sit before the threshold, follow an existing molded edge, or wrap a separate step only when the exact material and installation instructions support that use. Do not assume one continuous sheet should cover every change in plane. Clear edges often make the transition easier to inspect and maintain.
Map every moving and service boundary
Make a simple cockpit sketch and mark anything that opens, drains, rotates, slides, or needs future service. Include:
- Companionway parts: hatch boards, doors, sliding panels, and step edges.
- Locker boundaries: lids, hinges, latches, gutters, and finger pulls.
- Water routes: drains, scuppers, channels, and low points.
- Sailing hardware: winches, cleats, tracks, blocks, pedestal bases, and fasteners.
- Removable access: inspection plates and panels used for steering, electrical, or engine service.
Measure the open and closed positions of every moving part. Flooring should not be planned from the closed outline alone. A locker lid may swing toward a seat base, a hatch board may need a clear lifting path, and a removable panel may need an uncovered edge so it can be found and handled.
Separate standing zones from line-handling zones
A sailboat cockpit has different jobs within a small footprint. Mark where the helmsperson stands or sits, where crew trim lines, where people step down into the cabin, and where guests normally place their feet. Then mark where sheets and control lines travel during a maneuver.
This distinction matters because a comfortable-looking uninterrupted surface is not automatically a sensible layout. Keep the routes of working lines visible and preserve access to the hardware that guides them. Avoid creating decorative seams or borders where lines routinely sweep, gather, or are coiled. The goal is a cockpit that remains understandable during use, not simply one that photographs as a single color field.
Compare surface candidates with the same checklist
When comparing sheet materials, use the same questions for every candidate. Ask how the exact surface should be prepared, cut, joined, cleaned, removed, and repaired. Confirm whether it is intended for the current deck finish and whether the supplier provides instructions for edges, curves, vertical transitions, and hardware clearances.
Consider how the surface feels under bare feet and footwear, but do not treat texture as a safety guarantee. Water, sunscreen, dirt, wear, and footwear can change traction. Look for a texture you can clean around cockpit corners and hardware, and plan regular inspection rather than relying on a marketing label.
If you are still choosing between broad material categories, Focean’s sailboat cockpit flooring comparison discusses EVA foam and marine carpet by comfort, drainage, cleaning, seams, and access. Use that comparison to narrow the category, then return to this cockpit-specific checklist for the exact product.
Test pattern and color around real hardware
Judge color and pattern at full scale whenever possible. A small blue, gray, or tan sample may look calm in hand but become visually busy when repeated around locker lids, winches, and the companionway. Place a representative section beside gelcoat, cushions, metal hardware, canvas, and wood trim. View it in bright sun, shade, and evening light.
Check whether the pattern makes hatch edges, fasteners, drain openings, or loose lines harder to notice. High contrast can make the cockpit feel energetic; low contrast can look quieter. Neither is universally better. The useful choice is the one that keeps working boundaries legible while fitting the boat’s existing palette.
Plan panel direction before measuring quantity
Brushed grain, stripes, planks, or irregular shapes still create a visual direction. Choose a reference line, such as the cockpit centerline or companionway opening, and draw an arrow on every planned panel. Decide whether seat tops, sole panels, and steps should share that direction or act as clearly separate zones.
Create a numbered panel map before estimating sheet needs. Include each locker lid as its own panel, note which neighboring edges should align, and mark the areas that must remain uncovered. This prevents a quantity estimate from quietly assuming that every offcut can be rotated without changing the intended appearance.
For a related example of planning thresholds, access panels, drainage, and separate cockpit zones, see the cuddy-cabin cockpit layout guide. The boat type differs, but the method of treating an entrance as a functional boundary is useful.
Build full-size templates and dry-fit the layout
Templates help expose conflicts before material is cut. Use a stable template medium suitable for the project, label every piece, and record orientation. Mark hinges, latches, drains, fasteners, and required openings directly on the template. At the companionway, include the edge condition and the path of every removable or sliding component.
Lay the templates in position and operate the boat features they surround. Open lockers fully. Remove hatch boards. Slide the companionway hatch. Turn the helm through its normal range. Access service panels. Walk the route from the cabin to the cockpit while carrying an ordinary piece of gear. Revise any panel that makes these actions unclear or cramped.
Ask exact-product questions before ordering
A useful pre-purchase request is specific. Send the seller the boat model and year, photographs of the cockpit and companionway, the current deck surface, and a marked panel map. Then ask:
- Is this exact item intended for the current deck surface and the planned horizontal areas?
- What preparation, cutting, edge, seam, and curing instructions apply?
- How should clearances around drains, hardware, lockers, and access panels be handled?
- What cleaning products and methods should be avoided?
- How should a damaged section be inspected or repaired?
- What are the current product and commercial terms for this exact listing?
Review Focean’s current boat-flooring listings with the same question set. Do not apply details from one listing to another, and omit a planned feature if the answer is uncertain.
A practical sailboat cockpit buying checklist
Before making a final choice, confirm that you have:
- Photographed and mapped the companionway, lockers, drains, and sailing hardware.
- Separated standing, traffic, service, and line-handling zones.
- Compared full-size color and pattern references around real cockpit details.
- Assigned panel directions and preserved all moving and removable boundaries.
- Dry-fitted full-size templates and operated every nearby feature.
- Verified instructions and current terms for the exact flooring under consideration.
FAQ
Should cockpit flooring continue across the companionway threshold?
Not automatically. Treat the threshold as its own design decision. Preserve drainage, moving parts, step visibility, and the edge condition required by the exact product instructions.
Can one large panel cover the whole cockpit sole?
Sometimes the geometry allows a large panel, but locker lids, access plates, drains, and future service often require separate pieces or uncovered clearances. Build the panel map from function first.
How do I choose a cockpit pattern without hiding hardware?
Place a full-size reference beside hatch edges, drains, fasteners, lines, and the companionway. View it from normal working distance in different light. Adjust contrast, borders, or coverage if boundaries become difficult to see.
Practical takeaway
The right sailboat cockpit flooring starts with a functional map, not a color swatch. If a candidate keeps the companionway, lockers, drains, hardware, and line paths easy to understand—and the exact product instructions support the planned use—you have a sound basis for a purchase decision. If those details remain uncertain, pause and resolve them before ordering or cutting.
Share:
Camouflage Boat Flooring for Center Consoles: A Design Guide
How to Clean Center-Console Boat Flooring After a Saltwater Trip