
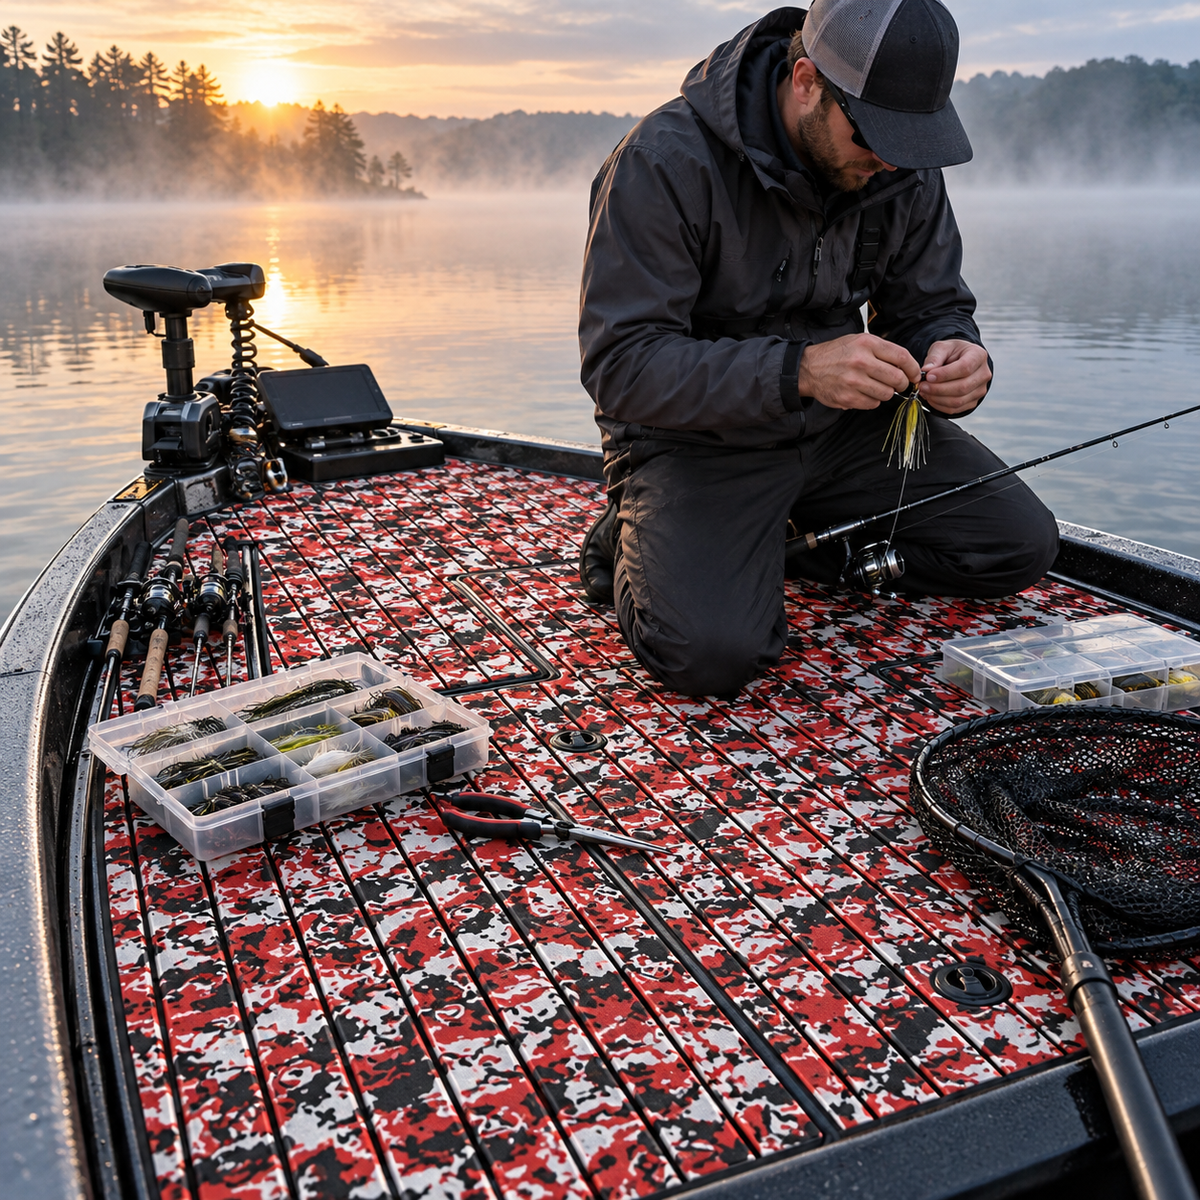
A rainy fishing day changes how a bass boat deck is used. Shoes carry water aboard, tackle boxes move between storage and the casting deck, rainwear limits movement, and every hatch may be opened with wet hands. The flooring decision is therefore not just about choosing a pattern or comparing materials. It is about keeping a small working deck understandable while weather, gear, and foot traffic change.
This guide explains how to plan sheet-material flooring around the real sequence of a wet outing. It focuses on water-entry routes, casting positions, hatch access, tackle staging, drainage, drying, and storage. It does not claim that any surface can guarantee footing or replace careful movement, suitable footwear, clean decks, and normal boating precautions.
Plan for a sequence, not a weather label
“Rainy day” can describe several different deck conditions. The boat may launch in drizzle, cross open water in a shower, fish through intermittent rain, or return to the ramp after the sky clears. Each phase puts people, water, and equipment in different places. Start by writing the sequence of a typical outing rather than treating the whole deck as one wet zone.
Note where the driver and passenger step aboard, where rain gear is put on, where rods are removed from storage, where tackle is opened, where an angler stands to cast, and where wet items go before trailering. This simple timeline helps separate repeated walking routes from temporary work areas.
Map the first water-entry routes
Water often arrives on deck through people and gear before rain becomes the main source. Mark the boarding step, cockpit entry, console or seat transition, and the route to the forward and aft casting decks. Include any place where someone changes direction, steps over a threshold, or moves around a pedestal base.
Observe the boat only while it is safely secured. Draw each route on a deck sketch and mark common pivot points. A panel boundary that looks balanced in a photograph may sit directly beneath a repeated turn. Use the route map to place seams and transitions where they remain visible and easy to inspect.
Keep the casting deck readable under changing conditions
A bass boat casting deck can shift quickly from open walking space to a work surface holding rods, a landing net, pliers, and lure boxes. Plan the flooring so the edges of hatches, pedestal sockets, trolling-motor hardware, and deck transitions remain visually distinct. A bold surface pattern should not obscure the boundaries that anglers need to notice.
Decide where active tackle can be staged without crossing the normal foot path. Keep loose line, hooks, tools, and open boxes out of the transfer route between cockpit and casting deck. Flooring can support an orderly layout, but it cannot compensate for equipment left where people step.
Preserve every hatch and service point
Rain often increases hatch use because jackets, towels, electronics, and tackle move in and out of storage. Open every lid through its full travel before making a template. Record hinges, latches, pull rings, drainage gaps, gas struts, fasteners, and any clearance needed between neighboring lids.
Treat each moving lid as its own functional panel. Do not bridge a gap or cover service hardware merely to continue a stripe or camouflage pattern. Dry-fit adjacent templates together, then open the lids in the order used during a real trip. The layout should preserve access even when someone is wearing bulky rain gear or holding equipment.
Trace existing drainage before adding flooring
Identify scuppers, channels, low points, drain openings, and removable plugs in the boat’s normal secured position. Follow the boat maker’s guidance for inspecting and maintaining those features. Do not assume that a flooring layer should redirect water or fill a low area.
Mark drainage details directly on the full-size template. Keep openings clear and panel edges observable. If a controlled water check is appropriate for the boat and location, use only a small amount and confirm that the planned panel boundaries do not interrupt the established route. Stop if the intended drainage behavior is unclear.
Separate wet gear, active tackle, and walking space
Create three temporary zones on the deck plan: a wet-gear zone for jackets and towels, an active-tackle zone for the items currently in use, and a clear movement route. These zones may change during the day, but assigning them in advance reduces last-minute clutter when weather arrives.
Check whether a cooler, net, tackle bag, or passenger seat blocks a hatch or forces someone onto a narrow edge. Rehearse the gear movement with empty or safely secured items. If the route depends on stepping across an open lid or loose equipment, revise the operating routine before finalizing panel shapes.
Evaluate texture and footing conditionally
Texture is one factor in a traction-focused deck plan, but water, mud, plant debris, fish residue, sunscreen, wear, footwear, and cleaning condition all affect footing. Compare current information for the exact flooring under consideration, including its intended substrate, preparation, installation, use, and care directions.
Also examine the surrounding system: handholds, deck lighting, clear paths, maintained drains, suitable footwear, and controlled movement. If a hatch, seat base, or deck transition already creates an unstable step, address that underlying problem instead of expecting the finish layer to solve it.
Plan for the change from rain to drying
The wet phase is only half the problem. At the end of the trip, gear is removed, hatches are checked, and the boat may be covered or stored. Build that transition into the flooring plan. Panel edges, grooves, hatch gaps, pedestal bases, and hardware should remain accessible for the care process specified for the exact material.
Before covering or storing the boat, follow the boat and flooring makers’ current directions. Inspect areas hidden beneath portable boxes, bags, seats, and rainwear. A consistent end-of-trip check makes it easier to notice trapped debris, blocked drainage, a raised edge, or a change around frequently used hardware.
Use a weather-based template checklist
A full-size template should carry functional notes, not just outlines. Label the centerline, forward direction, casting positions, boarding routes, hatch boundaries, drains, pedestal sockets, trolling-motor hardware, tackle staging, and areas that must remain uncovered. Add pattern direction only after these constraints are recorded.
Fit all neighboring templates at the same time. Walk the dry route in ordinary footwear while the boat is safely supported, open each hatch, move the empty gear containers used most often, and check access from the cockpit to both casting decks. Revise the paper or film template before transferring any shape to flooring.
Confirm the exact item before ordering or cutting
Category-level advice cannot establish compatibility with a particular bass boat. Confirm the deck substrate, surface condition, usable sheet dimensions, panel count, backing, edge treatment, preparation method, placement sequence, environmental limits, and care directions for the exact item. Resolve uncertain coatings, repairs, or flexible joints before purchase or installation.
Focean’s bass boat flooring comparison can help organize material questions around hatches, tackle, cleaning, and repair boundaries. If the project is moving toward installation, use the bass boat hatch installation guide to develop the template and dry-fit plan.
A pre-trip and post-trip deck routine
Before launching
- Check the forecast and follow applicable local boating guidance.
- Confirm that drains, hatch gaps, latches, and walking routes are clear.
- Assign locations for wet gear, active tackle, rods, and the landing net.
- Keep loose line, hooks, tools, and open boxes outside foot paths.
- Review the exact flooring and boat-care instructions that apply.
After the outing
- Remove portable gear so covered deck areas can be inspected.
- Address dirt and residue using the exact material’s current directions.
- Inspect seams, edges, grooves, hatches, bases, and drain openings.
- Follow the boat and flooring makers’ drying and storage guidance.
- Record any change that should be checked before the next trip.
FAQ
Should a bass boat use one continuous flooring panel on the casting deck?
Not automatically. Hatch lids, service points, deck geometry, sheet dimensions, drainage details, and future repair boundaries may favor separate functional panels. Use full-size templates and the exact product instructions to determine the layout.
Does a textured surface guarantee footing in rain?
No. Texture may contribute to a traction-focused plan, but contaminants, wear, footwear, water, maintenance, and movement all matter. Keep the deck clean and clear, use suitable footwear and available handholds, and move deliberately.
What should be checked after a wet fishing trip?
Follow the current care directions for the exact flooring, then inspect frequently covered zones, panel edges, grooves, hatch gaps, pedestal bases, trolling-motor hardware, and drains. The bass boat flooring cleaning guide provides a fuller zone-by-zone routine.
Practical takeaway
Plan bass boat flooring around the full wet-weather workflow: boarding, moving to the casting deck, opening storage, handling tackle, protecting drainage, cleaning, drying, and storing. Map those activities before choosing panel boundaries or pattern direction. A useful layout keeps the working deck understandable without overstating what flooring alone can do.
Review Focean’s current boat-flooring collection for exact-item information, then contact Focean with deck photographs, substrate details, dimensions, hatch locations, and intended use to ask which current information applies to your project.
Share:
How to Plan RIB Flooring Around Boarding Ladders
How to Plan Boat Flooring Around a Swim Platform