
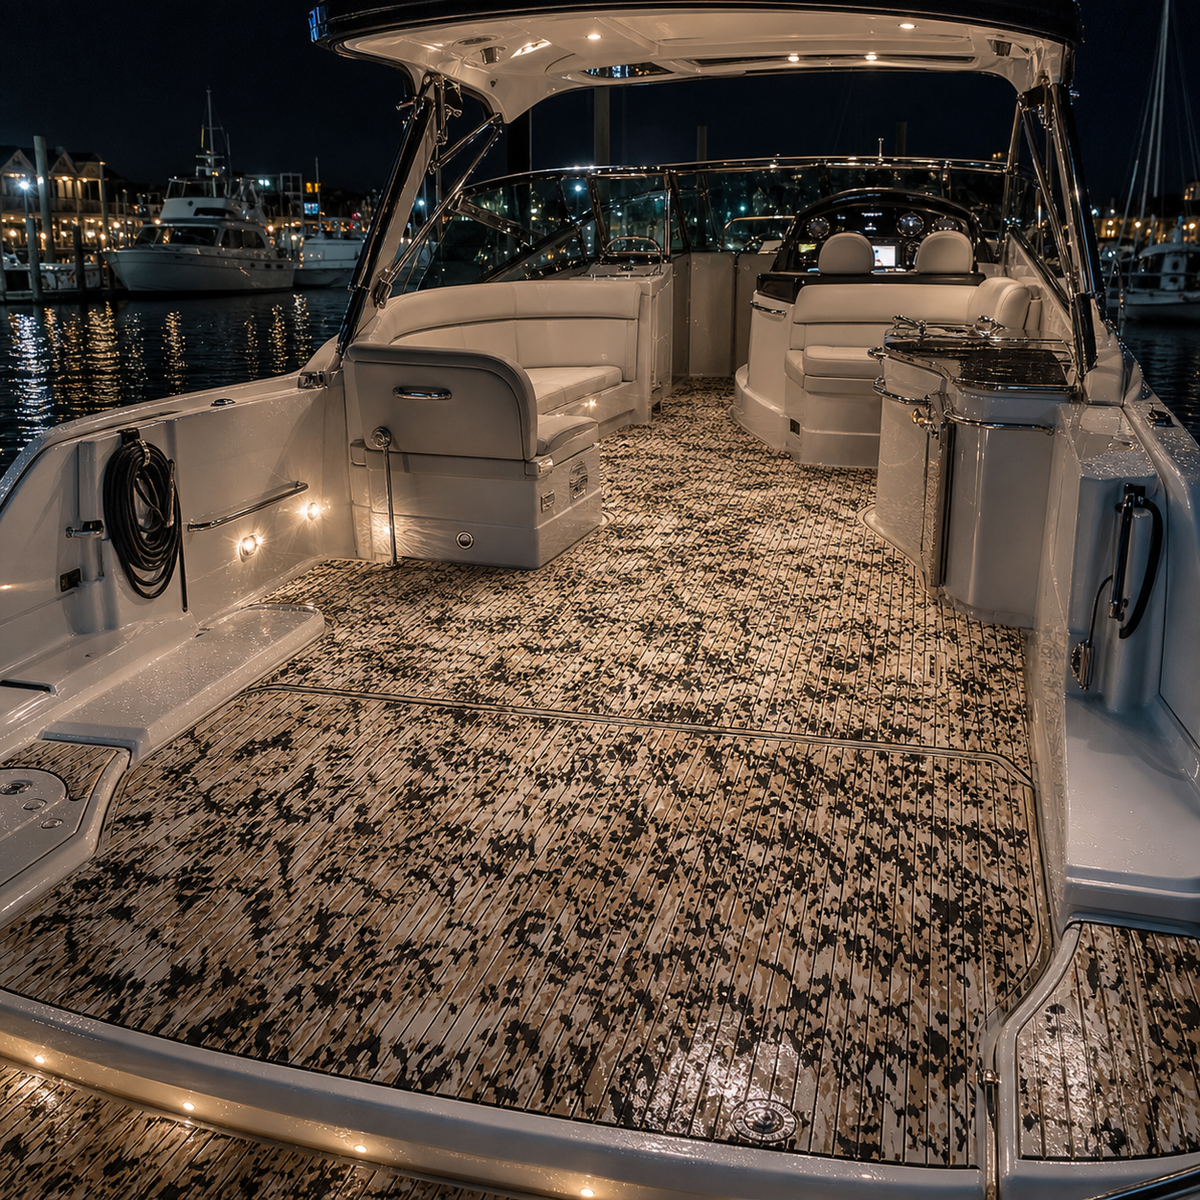
A cabin cruiser cockpit sits between two worlds. It is an outdoor room exposed to spray, sun, food, footwear, and dock traffic, but it is also the threshold to an enclosed cabin. Flooring therefore has to work as part of a larger system: deck drainage, hatch access, door clearances, seating, cleaning, and the way people move between wet and dry spaces.
Choosing boat flooring for cabin cruiser cockpits is less about finding one material with the biggest list of promises and more about matching the surface to the boat. This guide offers a planning process for comparing EVA foam and other options without assuming that one construction suits every cruiser. Product details and care instructions vary, so confirm the exact backing, thickness, compatibility, and current terms for any SKU before ordering.
Begin with the cockpit's weather map
Before comparing colors or patterns, observe what happens in the cockpit during a normal trip. Note where spray enters, where rainwater collects, which areas stay shaded, and where wet passengers step aboard. A cockpit beneath a hardtop may have protected seating but exposed side decks. A canvas enclosure can change the weather pattern again, especially around openings and tracks.
Draw a simple overhead map and mark four zones:
- Direct-exposure zones: places that regularly receive rain, spray, or intense sunlight.
- Transition zones: steps, cabin doors, dock-side boarding points, and swim-platform approaches.
- Service zones: engine hatches, lockers, drains, table mounts, and removable panels.
- Living zones: seating, food-preparation areas, coolers, and places where passengers stand or relax.
This weather map helps you ask useful questions. Instead of asking whether a flooring material is simply “durable,” ask how the selected product should be cleaned, how its edges should be detailed, and whether it is suitable for the specific substrate and exposure pattern on your boat.
Protect drainage before changing the surface
Water management is a deck-design issue, not a feature that flooring can replace. Locate every drain, scupper, channel, low point, and opening before making templates. Check the deck in its normal operating attitude because water may travel differently when the boat is afloat than when it is stored on land.
A new surface should not cover a drain, narrow a channel, or create an edge that traps debris. Preserve clear paths for water and keep removable drain fittings accessible. If the existing deck holds water, investigate the cause before installing a finish over it. Covering the symptom can make inspection and cleanup more difficult.
After planning the panel layout, test it with water using a method appropriate for the boat and location. Watch the route rather than only the final drain point. This can reveal a seam or transition that needs to move before any permanent installation begins.
Plan traffic from dock to cabin
Cruiser cockpits often concentrate movement into a few narrow paths. Guests step aboard, turn around seating, carry bags toward the cabin, and move between the helm and the stern. These repeated routes deserve more attention than low-traffic corners.
Mark pivot points, step-downs, doorways, and places where a person may be carrying gear instead of watching the deck. Avoid small filler pieces or raised transitions in those areas when the layout allows. Keep level changes visible and make sure a new surface does not interfere with doors, latches, folding seats, or removable tables.
Texture can support a traction-focused design, but no deck surface eliminates slip risk. Water, sunscreen, soap, food residue, wear, and footwear all change traction. Good planning combines a suitable texture with drainage, prompt cleanup, secure handholds, adequate lighting, and careful movement.
Treat hatches as part of the design
Access panels are especially important on cabin cruisers because mechanical and storage spaces may sit beneath the cockpit. Every hatch still needs to open fully and remain identifiable after the flooring is installed. Hinges, latches, lift points, fasteners, seals, and ventilation openings must continue to function.
Create a separate template for each hatch rather than drawing one large panel across multiple openings. Label the orientation and neighboring panels. Dry-fit the complete layout, then open and close every hatch several times. Check edge gaps, hinge movement, latch reach, and whether a panel adds bulk near a seal or frame.
Do not cover identification plates, safety equipment, inspection ports, or fasteners that technicians may need. A neat outline around service points is usually more useful than visual continuity that makes maintenance harder.
Compare materials with cockpit-specific questions
EVA foam, marine carpet, vinyl surfaces, molded deck finishes, and other systems have different strengths and care needs. A useful comparison does not begin with a winner. It begins with the conditions on your boat and the exact construction being considered.
Use the same questions for every candidate:
- Is the material compatible with the existing deck surface and its condition?
- How should it be fitted around hatches, drains, doors, and curved edges?
- What cleaning methods and products does the supplier specify?
- How easy is it to inspect the deck and reach service points later?
- How does the texture feel with the footwear normally used aboard?
- How visible are seams and changes in level under daytime and cockpit lighting?
- What current product terms apply to the exact SKU?
Be cautious with broad claims about weather, fading, adhesion, or safety. Ask what documentation supports a statement, which product it applies to, and under what conditions. If the scope is unclear, leave the claim out of the decision and focus on characteristics you can verify.
Choose a pattern that works with the boat
Pattern direction can make a cockpit look orderly, but it also exposes alignment errors. Select a reference line based on the boat itself, such as a centerline, long seat base, or straight hatch edge. Do not assume the dock, trailer, or cabin doorway is perfectly square to the deck.
Lay out full-size templates and view them from the boarding point, helm, cabin entrance, and seating area. Check whether pattern changes emphasize an awkward angle or help define functional zones. On a visually busy cockpit, a restrained layout may be easier to read. On a simpler deck, a contrasting border can frame openings, provided it does not create a misleading step cue.
Evaluate color in the boat's real light. Screens can distort shade and contrast, while upholstery, fiberglass, canvas, and evening lighting change how a surface appears. If you have an authorized physical reference, place it in several cockpit zones and view it at different times before deciding.
Build maintenance into the selection
A weather-ready cockpit is one that can be inspected and cleaned without a complicated ritual. List the messes your boat actually sees: salt residue, lake water, sand, leaves, food, sunscreen, fish residue, or tracked-in dock dirt. Then compare those needs with the current care instructions for each candidate.
A sensible routine begins by removing loose debris before it is ground into texture. Address spills early, use only compatible cleaning products, and test unfamiliar methods in a small, inconspicuous area. More aggressive scrubbing is not automatically better. Allow the cockpit to dry appropriately before closing covers or leaving the boat unattended.
During regular cleanup, inspect seams, edges, drains, hatch borders, and transition points. Look for trapped debris, blocked water paths, damage, or changes that need attention. Early observation makes it easier to distinguish a cleaning issue from an installation or deck-maintenance issue.
Use a full dry fit before installation
Templates are the lowest-risk place to find mistakes. Mark each piece with orientation, panel number, and adjacent edges. Place the full set on the deck and walk the normal route through the cockpit. Open doors and hatches, move removable furniture, operate seat mechanisms, and check access to hardware.
Review seam positions from standing height as well as close range. Tiny correction pieces and narrow points may be difficult to align cleanly. Curved corners and deliberate spacing can produce a more coherent result than forcing a panel into an irregular gap.
If the installation method is unfamiliar, consult the product instructions or a qualified installer. Substrate preparation, moisture, existing coatings, temperature, and backing type can affect the process, and those details should be confirmed for the exact materials involved.
Practical takeaway: make a one-page cockpit worksheet
Before shopping, create a single worksheet with the weather map, traffic route, drains, hatches, door clearances, seating, and common messes. Add photos of every service opening and transition. Use that sheet to compare materials and to ask precise questions about compatibility, cleaning, edge treatment, and current terms.
If Focean is part of your comparison, bring the worksheet when reviewing its site information or contacting the team. The useful conversation is not “What flooring is best?” but “What should I confirm for this cockpit, this substrate, and these access points?”
Frequently asked questions
Is EVA foam suitable for every cabin cruiser cockpit?
No material should be treated as universally compatible. The deck substrate, existing finish, drainage, access requirements, exposure, and exact product construction all matter. Confirm the requirements for the selected SKU and your specific boat before installation.
Can textured flooring eliminate slip risk in a wet cockpit?
No. Texture may contribute to a traction-focused surface, but water, contaminants, footwear, wear, and maintenance affect traction. Preserve drainage, clean spills promptly, use handholds, and move carefully in wet areas.
Should flooring cross an engine hatch seam?
The hatch must remain operable, identifiable, and serviceable. A separate, carefully fitted panel usually makes the boundary easier to maintain. Confirm clearances around hinges, latches, seals, and ventilation before finalizing the layout.
How can I judge weather-related claims?
Ask for current documentation that identifies the exact product, test or basis, conditions, and scope of the claim. Do not assume that a statement about one construction applies to every color, backing, installation, or use environment.
Ready to plan the cockpit? Review Focean as one option, use the worksheet above, and confirm fit, backing, thickness, care instructions, and current terms for the exact SKU you are considering.
Share:
How to Choose Comfortable Pontoon Boat Flooring for Busy Decks
Custom Boat Flooring for Sport-Fishing Cockpits: A Design Guide