
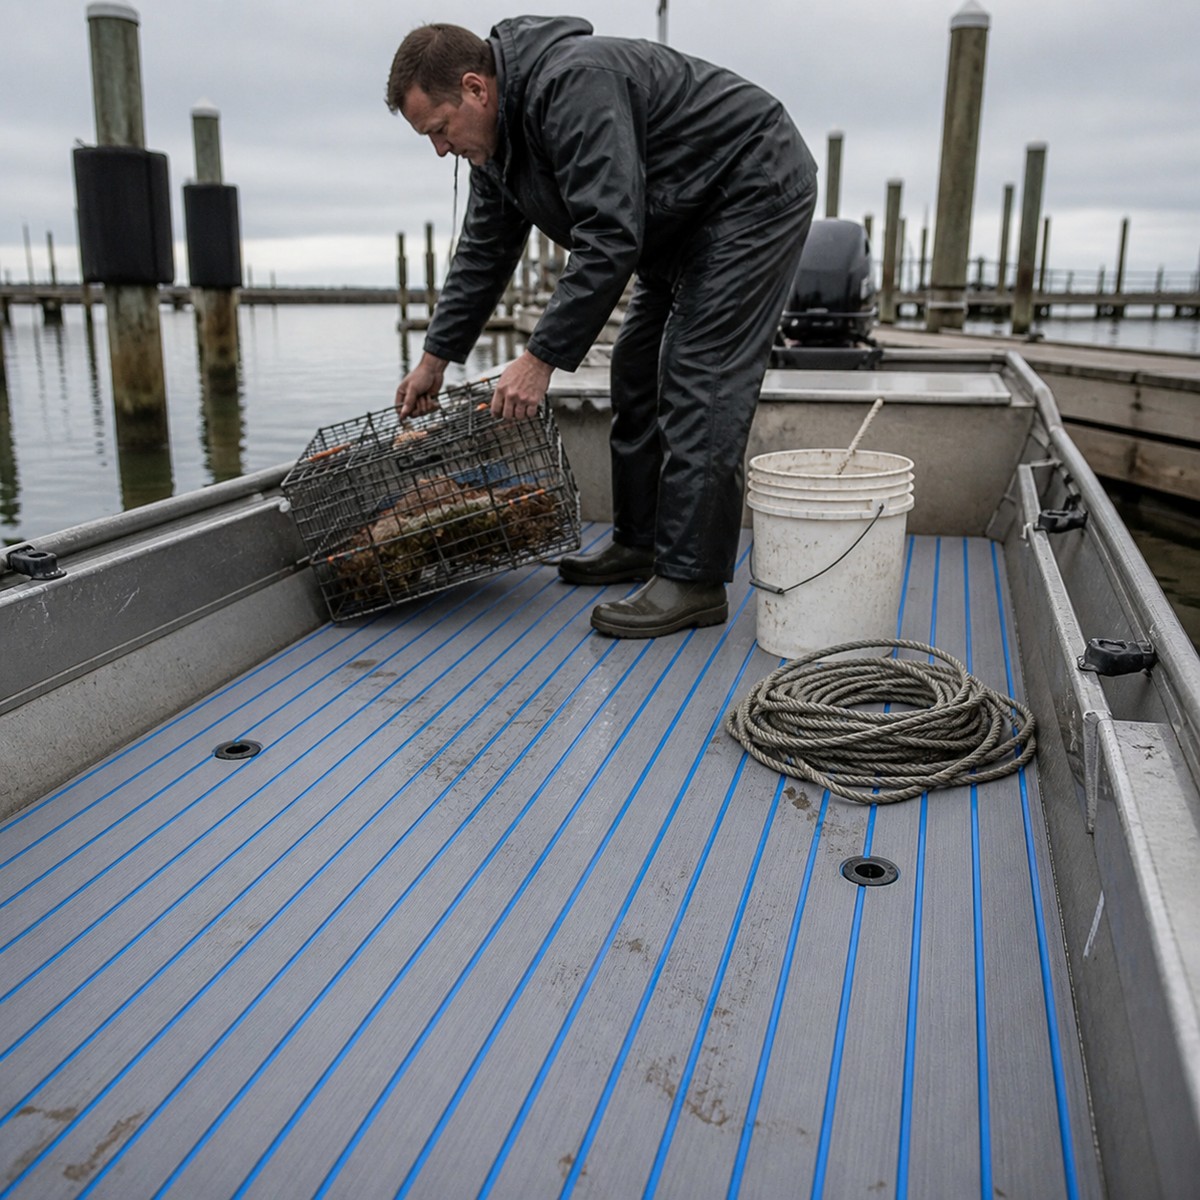
A small skiff can ask a lot from a narrow deck. One trip may involve stepping aboard from a dock, carrying a bucket forward, setting down a trap or tackle box, handling a coiled line, and returning with wet gear. Those movements overlap, so a flooring plan that looks tidy in an empty boat may become awkward once the work begins.
This guide explains how to plan traction-focused sheet flooring for skiff boarding and work zones. It does not promise that a texture can prevent slips. Water, mud, fish residue, footwear, loose lines, wear, and cleaning all affect footing. The goal is to create a deck map that keeps movement predictable, access visible, and the selected product’s documented requirements at the center of the decision.
Start with the jobs your skiff actually performs
Write down the five or six actions that happen most often. Examples might include stepping down from a dock, launching from a beach, moving between a tiller and the bow, lifting a cooler, setting a crab pot, landing a fish, or reaching a fuel tank. Then photograph the empty boat from the stern, bow, and both sides.
Mark each action on a simple deck sketch. Use arrows for walking routes and circles for standing or kneeling points. Add the places where gear is normally placed, even if it is only there for a few minutes. This turns “I want better flooring” into a useful question: which zones need a clear surface plan, and which areas should remain uncovered for access or inspection?
Separate boarding, travel, and work zones
A skiff deck becomes easier to plan when it is divided by function rather than by open square footage.
- Boarding zone: the first step from the dock, trailer, shoreline, or another boat.
- Travel lane: the route between the entry point, helm or tiller, storage, and bow.
- Work zone: the area used for fishing, traps, lines, buckets, tools, or repeated kneeling.
- Service zone: hatches, drains, fasteners, tanks, wiring access, and removable equipment.
These zones can overlap, but they should not disappear from the plan. A panel edge that is unobtrusive beside a bench may be inconvenient at the first boarding step. A broad work panel may look clean yet hide the outline of an access cover. Review every proposed panel against all four functions.
Map the first and last step
Boarding is a transition, not just a patch of deck. Observe where a foot lands after stepping over the gunwale or down from the dock. Note whether a hand reaches for a rail, seat, or side, and whether bags or equipment are carried through the same space. Repeat the check for leaving the boat, because the route and body position may differ.
Keep the landing area free of loose-line storage, movable buckets, and narrow flooring offcuts. If the skiff is boarded from more than one side, map both paths instead of assuming one layout solves every entry. Do not describe any surface as slip-proof. Inspect the exact texture under controlled dry and wet conditions, follow the supplier’s guidance, and treat housekeeping and footwear as part of the footing plan.
Keep gear routes visible and uncomplicated
Skiffs often carry equipment that is wet, muddy, heavy, or awkwardly shaped. Place empty versions of the usual bucket, cooler, trap, tackle box, or storage bin on the deck map. Walk the route you use to load, work with, and unload each item. Look for places where the object blocks a panel boundary, drain, hatch pull, or natural foot position.
Flooring color and pattern can help define a travel lane, but they cannot organize loose gear by themselves. Decide where lines, tools, and containers will live before finalizing panels. High visual contrast between the surface, drains, hardware, and common gear can make boundaries easier to notice; judge that contrast in the actual boat rather than from a small screen image.
Evaluate texture as one part of a system
Texture matters, but it is only one variable. Water paths, contamination, panel edges, wear, footwear, and cleaning practices influence how a deck feels in use. Compare exact product samples using the same controlled observations. Check them dry, lightly wet, and after the permitted cleaning routine. Stop if the supplier does not provide the preparation, placement, care, or compatibility information needed for your boat.
Also examine whether grooves or pattern direction collect the debris common to your trips. A pronounced texture may feel distinct underfoot while requiring more attention around mud, scales, or plant material. A simpler face may be easier to inspect but still needs an appropriate deck layout. Record what you observe without extending one sample result to every product in the material category.
Protect drains, hatches, and service points
Mark every drain, limber path, hatch, fastener, seat base, tank fitting, battery access point, and removable floor section. Open and operate each one while full-size paper templates are in place. The flooring plan should keep moving boundaries recognizable and allow routine service without guessing where a fastener or cover has been hidden.
Pay particular attention to a drain beside the boarding or work zone. Do not use a panel to disguise an existing low point or water path. If the deck holds water before the project, investigate that condition rather than treating new flooring as the solution. Follow the boat builder’s information and exact flooring instructions for all preparation and placement decisions.
Plan panel edges around real foot placement
Trace where people pivot, brace, and kneel while handling gear. Then compare those marks with the proposed panel map. Avoid creating a very narrow strip in a busy landing point simply to use leftover material. Where the product instructions allow, place boundaries near existing molded breaks, bench bases, or low-traffic transitions.
Use full-size templates rather than dimensions alone. Label every template with the bow direction, neighboring panel, and associated hatch or hardware. A complete dry fit lets you see whether pattern lines remain coherent, edge spacing is consistent, and the work route remains understandable when the boat is loaded.
Choose color and pattern for a working deck
A small skiff can make a bold pattern feel busier than it did on a sample. Lay temporary paper strips across the deck and view them from the dock, tiller, bow, and normal standing height. Check whether the direction supports the boat’s length or competes with hatch outlines and gear.
Inspect physical samples in sun and shade beside the aluminum, fiberglass, seats, and equipment already on the boat. Keep this evaluation visual. Color alone does not establish surface temperature, fade resistance, lifespan, or any other performance characteristic. Those questions require current evidence for the exact product.
Build cleaning and inspection into the choice
List the debris your skiff actually sees: sand, mud, fish residue, leaves, bait, dock dirt, or spilled drinks. Review the permitted tools and cleaners for each exact flooring option. Consider how you will clear loose material, wash the surface, reach grooves and edges, direct rinse water toward the boat’s intended drainage, and allow the deck to dry before gear returns.
After a controlled cleaning check, inspect panel edges, hatch gaps, drains, and gear footprints. A repeatable routine is more useful than an aggressive cleaner or unsupported shortcut. If residue remains, follow the documented guidance for that product instead of escalating pressure or chemicals by guesswork.
Use a skiff-specific pre-order worksheet
For every exact product under consideration, record answers to the same questions:
- Which substrates, surface conditions, and preparation steps are specified?
- How should panels, edges, seams, curves, and moving covers be handled?
- Which cleaners, tools, and inspection practices are permitted?
- How will the boarding landing, travel lane, and work zone be divided?
- Will every drain, hatch, fastener, and service point remain identifiable?
- What current terms apply to the exact item being evaluated?
Use current primary information for each answer and leave unresolved cells visible. Focean’s EVA foam and marine vinyl guide for skiffs offers a related material-comparison framework. If your boat is closer to a shallow flats layout, the flats-boat flooring buyer’s guide provides additional questions for casting areas, hatches, and low-profile decks.
FAQ
Does textured flooring make a wet skiff safe?
No surface removes risk. Water, mud, fish residue, loose gear, wear, footwear, and movement all affect footing. Evaluate the exact texture under controlled conditions and keep the deck organized, clean, and inspected.
Should flooring cover the entire skiff deck?
Not automatically. Coverage should follow the boat’s construction, access needs, drainage, work zones, and the exact product instructions. Leaving a service area clear may be more useful than forcing full coverage.
Can measurements replace full-size templates?
Measurements are useful, but they may not reveal curved sides, uneven spacing, hatch clearance, or where a person actually steps. Full-size labeled templates and a complete dry fit provide a more practical review.
Practical takeaway
Plan skiff flooring around actions, not empty deck area. Map the first step, travel lane, wet work, gear storage, drains, and service points; compare exact products with the same questions; and dry-fit every panel before committing. When evaluating a Focean option, confirm the selected sheet, substrate guidance, preparation, placement, care, and current terms for that exact item. For product-specific questions, contact Focean with clear deck photographs and a labeled zone map.
Share:
EVA Foam vs. Marine Vinyl for RIB Cockpits and Boarding Zones
Pontoon Boat Flooring for Changing Weather: A Planning Guide