
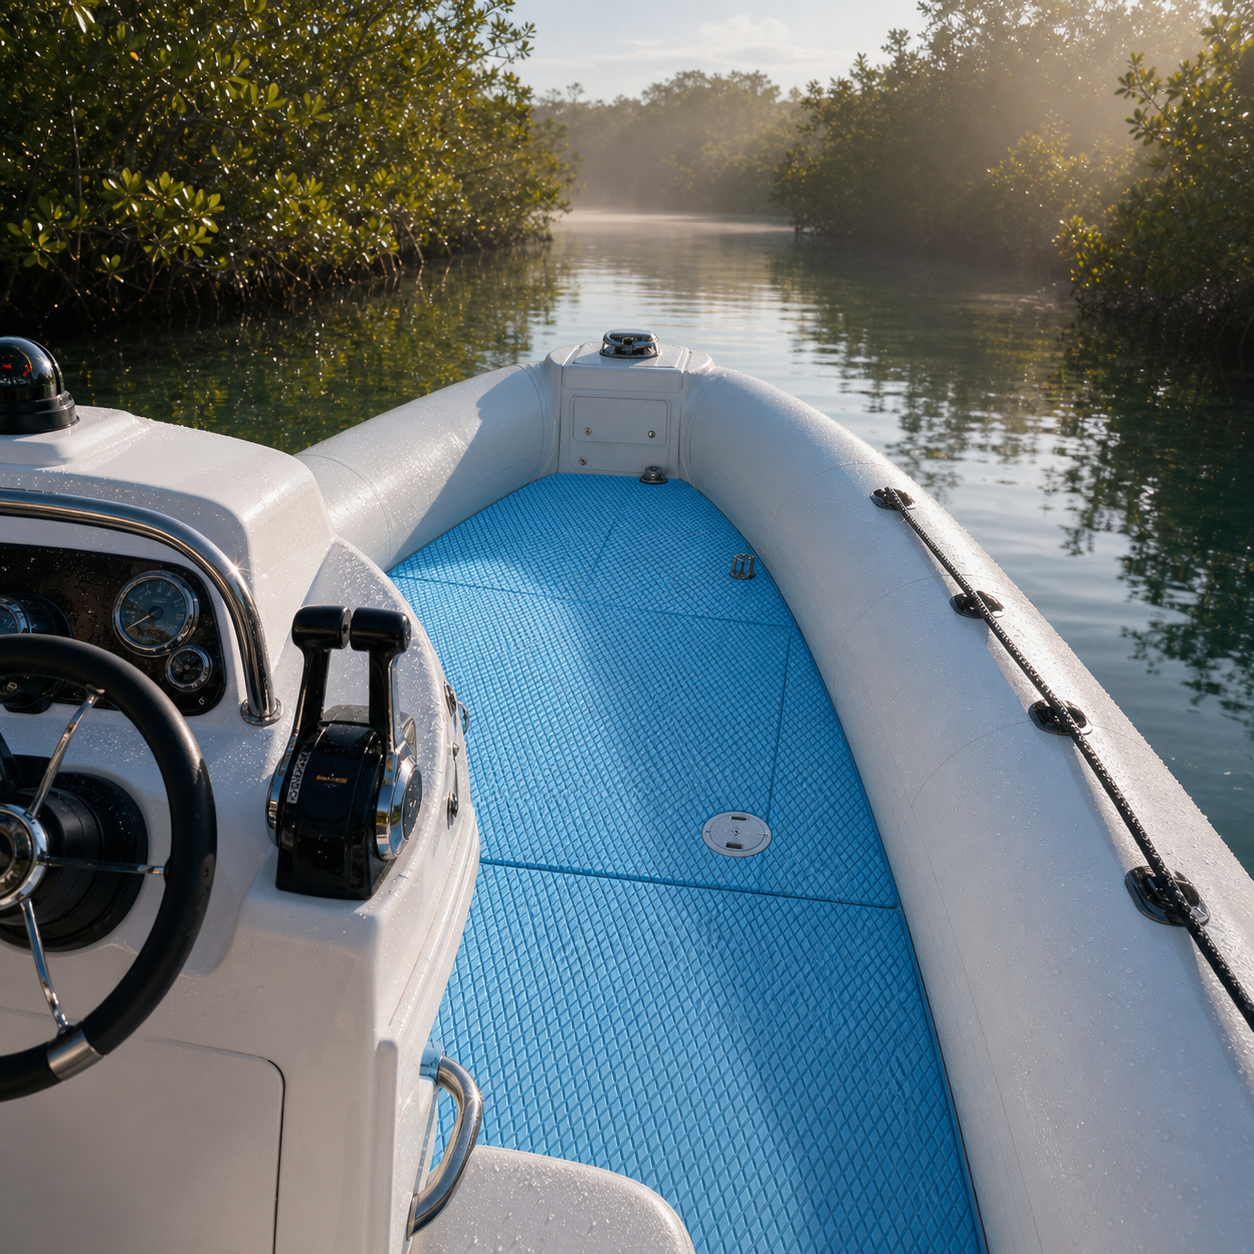
Rigid inflatable boats pack a lot of activity into a compact deck. People step over tubes, move around a console, handle wet lines, shift fuel tanks or coolers, and board from docks that are not always level. Add bright sun, passing rain, spray, and temperature changes, and the flooring has to work as part of the whole cockpit rather than as a decorative layer.
This guide explains how to plan RIB boat flooring for changing weather without relying on one-size-fits-all promises. The goal is a deck layout that respects drainage, access, cleaning, movement, and the exact substrate on your boat. Product details vary, so confirm the specifications, backing, compatibility, and current terms for the flooring you are considering before ordering.
Start with the way your RIB is actually used
A tender that makes short marina runs has a different routine from a RIB used for fishing, diving, family outings, or harbor work. Before comparing colors or patterns, list the jobs that happen on deck. Note where passengers board, where the driver plants their feet, where bags land, and which areas regularly receive spray.
Then walk through a normal trip from launch to cleanup. This simple exercise often reveals pressure points that a top-down photo misses: a narrow path beside the console, a hatch that needs full swing clearance, a drain that must remain open, or a tie-down point that cannot be covered. Flooring should support these routines without hiding service points or making equipment harder to secure.
Map water before choosing a layout
Changing weather matters most when water has somewhere to collect. Watch the deck after rinsing or after a rain shower. Identify the low points, drains, channels, hatch gutters, and seams that guide water away. A useful flooring plan works with those paths rather than bridging over them.
Pay close attention to the boundary where the rigid deck meets inflatable tubes, console bases, seat boxes, and molded steps. These transitions are rarely perfect straight lines. Leave the clearance required by the boat builder and flooring supplier, and avoid covering labels, fasteners, inspection ports, or fittings. If water disappears under a removable component, trace where it goes before creating a template.
Drainage also affects cleaning. Narrow gaps that trap sand, scales, leaves, or dock debris can become frustrating even when the main deck looks tidy. Plan edges so you can reach them with the cleaning method approved for both the boat and the selected flooring.
Evaluate weather exposure by zone
Not every part of a RIB experiences the same conditions. The bow may receive direct sun and spray. The helm can be partly shaded by a console or top. A stern boarding area may stay wet longer, while space beneath a seat can remain damp because airflow is limited. Divide the cockpit into exposure zones instead of treating the deck as one uniform surface.
For each zone, record direct sunlight, routine wetting, likely contaminants, foot traffic, and how quickly the area dries. This does not prove how a material will perform, but it gives you a practical checklist for questions to ask. Request exact documentation for the selected SKU when evaluating temperature limits, UV performance, backing, cleaning compatibility, or use in persistently wet areas. General marketing language is not a substitute for product-specific information.
Think about traction as a system
Texture can be useful on a working deck, but no surface removes the need for careful movement. Water, sunscreen, fish residue, fuel, cleaners, wear, and footwear can all affect footing. Look at the entire system: surface texture, drainage, cleaning habits, handholds, lighting, and the path people take while the boat is moving.
Prioritize clear walking routes around the helm and between boarding points. Avoid visual patterns that make hatch edges difficult to see. Keep grab rails accessible, and do not let a new floor treatment conceal a step, latch, or change in level. After installation, test the deck cautiously in dry and wet conditions before normal use, following the boat and flooring manufacturers' instructions.
Build a template around real hardware
A RIB cockpit often contains more interruptions than its size suggests: console feet, seat bases, lifting points, drains, hatch hinges, access panels, fuel fittings, and tie-down hardware. A careful template should capture each fixed element and show which parts must remain removable.
- Photograph the deck. Take wide views plus close-ups of every edge, fitting, and transition. Include a reference in the frame so orientation is obvious later.
- Mark a centerline. Use a stable boat feature rather than assuming molded edges are symmetrical.
- Template separate zones. Smaller sections are easier to verify around consoles, hatches, and curved tube boundaries.
- Label every piece. Record bow, stern, port, starboard, adjacent panels, and hardware clearances.
- Dry-check the full set. Confirm drainage, hatch travel, access, and edge spacing before committing to the final material.
If a hatch is removable, template the hatch and surrounding deck as separate pieces. If the boat has flexible movement near the tubes, ask the boat builder or a qualified installer how that transition should be treated. Do not assume a method used on a rigid cockpit wall is appropriate for an inflatable boundary.
Prepare for temperature and moisture changes
Installation conditions matter because the deck, flooring, and adhesive system can respond differently to temperature and moisture. Follow the current instructions for the exact flooring product and substrate. If those instructions specify a preparation range, cure period, primer, or surface test, treat those details as requirements rather than suggestions.
The substrate should be clean, dry, stable, and free from residues that could interfere with the approved installation method. Old wax, polish, oil, salt film, and cleaning products can be difficult to see. Use only preparation products confirmed as compatible with the boat surface and flooring system. A small test in an inconspicuous area can help reveal finish damage or residue, but it does not replace the manufacturer's directions.
Schedule the work when you can protect the deck from rain, dew, dust, and foot traffic for the required period. Rushing because the forecast is changing can create avoidable problems. If the environment cannot meet the instructions, postpone the installation or use a controlled workspace.
Plan edges for inspection and upkeep
Edges deserve as much attention as the field of the deck. Curves around tubes, corners beside the console, and cutouts around hardware are the places most likely to be bumped by gear or exposed during cleaning. Smooth, consistent outlines are easier to inspect than complicated decorative cuts.
Create a routine that includes checking edges, seams, hatch clearances, and drains. Remove contaminants promptly using methods approved for the material. After rough weather or transport, look for movement, trapped debris, or damage around frequently used access points. If a section changes condition, investigate the cause before applying an improvised repair that could hide moisture or restrict access.
Choose color and pattern for the cockpit
Color affects the visual character of a small RIB deck. A restrained palette can make hardware and walking paths easier to read, while strong contrast can emphasize panel borders or hatch outlines. Consider the tube color, console, upholstery, and the amount of exposed deck in the final composition.
Pattern scale matters too. View a full-size sample or accurate rendering from standing height, not only as a close-up. Dense graphics can look different across several adjacent panels, especially when the cockpit includes many cutouts. Confirm how pattern direction will continue from one piece to the next before final cutting.
A practical pre-order checklist
- Identify the exact boat model, deck substrate, and intended use.
- Map drains, channels, hatches, fittings, and removable service panels.
- Record sun, spray, rain, drying, and contaminant exposure by zone.
- Confirm product-specific backing, compatibility, care, and installation instructions.
- Check that templates preserve access and do not obstruct drainage.
- Review color, pattern direction, panel boundaries, and visible hatch edges.
- Plan a suitable installation window and a cautious post-installation inspection.
Frequently asked questions
Can RIB flooring cover the entire cockpit?
Coverage depends on the boat's substrate, drainage design, hardware, access panels, and the flooring instructions. Keep drains, labels, fittings, fasteners, and service points accessible. Confirm uncertain areas with the boat builder or a qualified installer.
How should I handle the edge beside an inflatable tube?
Do not guess. The transition may move, flex, or require clearance. Follow guidance for the exact boat construction and flooring system, and avoid attaching material to an inflatable surface unless the relevant manufacturer explicitly approves that application.
Does textured flooring make a wet RIB deck safe?
No flooring makes a wet deck risk-free. Texture is only one part of deck management. Drainage, contamination, wear, footwear, lighting, handholds, boat motion, and careful behavior all influence footing.
What should I send when asking about flooring options?
Provide the boat model, clear deck photos, substrate information, measurements or templates, intended use, typical exposure, and any access constraints. The more accurately the cockpit is documented, the easier it is to discuss a suitable layout.
Practical takeaway
Good RIB boat flooring planning begins with water paths and access, not color. Map the cockpit, divide it by weather exposure, document every fitting, and verify the exact product instructions before finalizing a template. That process produces a cleaner layout and makes later inspection and maintenance more straightforward.
If you are comparing options, contact Focean with deck photos, substrate details, measurements, and your typical boating conditions. Ask for the current specifications, compatibility guidance, care instructions, and commercial terms that apply to the exact flooring option you are considering.
Share:
Comfortable Wake Boat Flooring: A Cockpit Planning Guide
Custom Boat Flooring for Shallow-Water Fishing Boats: A Layout Guide