
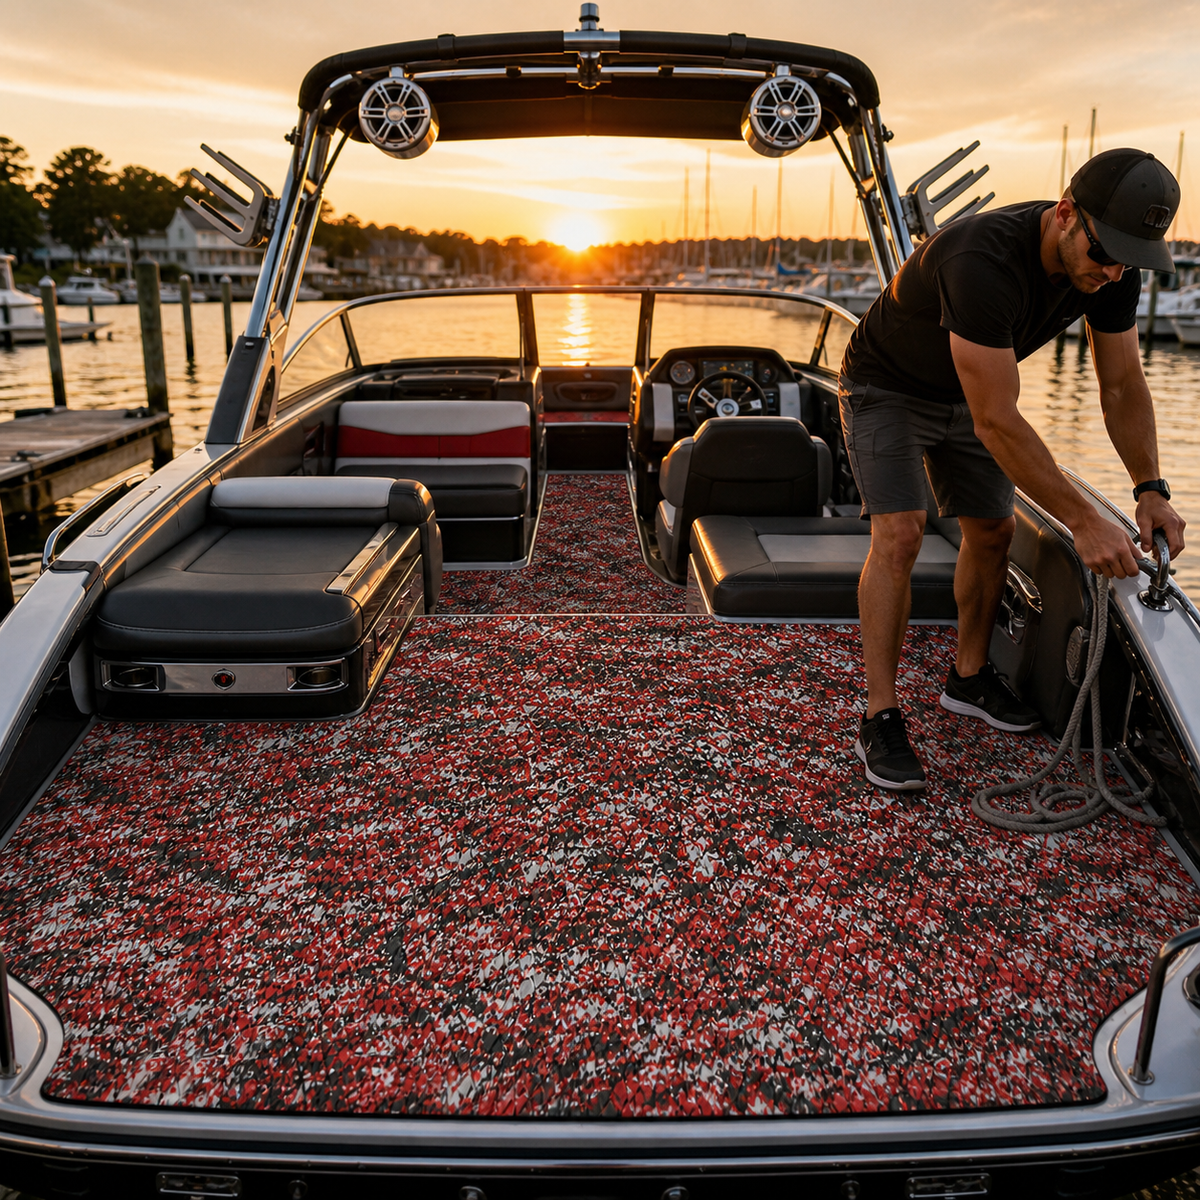
A bowrider can shift from quiet cruising to swimming, towing, picnicking, and marina stops in a single day. Its flooring has to fit around a busy mix of walkways, seat bases, storage lids, the helm, and the open bow. That makes choosing boat flooring for a bowrider less about picking a color from a small swatch and more about understanding how the entire cockpit works.
This buyer’s guide explains how to compare flooring options, plan coverage, review templates, and prepare useful questions before ordering. It focuses on practical decision-making rather than universal performance promises. Always confirm the specifications, backing, compatibility, installation method, care instructions, and current commercial terms for the exact material and boat under consideration.
Start with how your bowrider is actually used
Two similar-looking bowriders may need very different flooring plans. One may spend most weekends carrying swimmers and wet gear. Another may be used for evening cruises, watersports, or frequent dockside stops. Make a short list of the activities that create the most movement, moisture, sand, food spills, and equipment traffic aboard your boat.
Then trace the main routes through the cockpit. Common paths include the swim platform to the cockpit, the helm to the bow walkway, and the seating area to storage compartments. Note where passengers step down, turn, brace, or set down coolers and bags. These routes help determine which areas deserve full coverage and where visible transitions are preferable.
Do not treat texture alone as a safety solution. Water, sunscreen, cleaners, loose gear, wear, footwear, and boat motion all affect footing. A sensible deck plan also depends on drainage, clear walkways, lighting, handholds, housekeeping, and careful movement.
Decide which areas belong in the project
A complete bowrider layout may include the main cockpit, helm footwell, passenger footwell, bow seating floor, center walkway, steps, storage lids, and swim platform. Covering every possible surface is not automatically the best choice. Some molded areas may need to remain exposed for drainage, service access, labeling, or equipment clearance.
Photograph the boat from the stern, helm, bow, and overhead angles. Mark each fixed surface and each part that moves. Open every hatch and seat base through its full travel. Identify drains, inspection plates, fasteners, hinges, latches, pedestal mounts, table sockets, and removable panels. Flooring should not hide the items that owners or technicians need to reach.
Think about edge placement as well. A seam in the middle of a heavily traveled turn may be more noticeable than one aligned with a molded boundary. Very narrow pieces can be difficult to position cleanly. A clear panel plan lets you discuss these tradeoffs before material is cut.
Compare surfaces with real conditions in mind
When evaluating EVA foam boat flooring, marine carpet, vinyl, or another deck surface, compare the exact products rather than assuming every material in a category behaves the same way. Ask for current information that applies to the selected option and its intended location.
Useful comparison questions include:
- What substrate preparation does this option require?
- Is the backing and installation method appropriate for each planned area?
- How should the surface be cleaned after ordinary boating use?
- Which cleaners, tools, or treatments should be avoided?
- How are exposed edges, curves, drains, and removable panels handled?
- What instructions apply before the boat returns to use?
- How are damaged or individually replaceable sections addressed?
Review texture at standing height and under the lighting in which the boat is normally used. A close-up may make a pattern look subtle or dramatic in ways that do not translate to a full cockpit. If a surface will appear in both the cockpit and bow, consider how the design reads across separate spaces.
Use color and pattern to clarify the layout
Bowriders contain many visual elements: upholstery panels, windshields, consoles, speakers, rails, hull colors, and hardware. Flooring can connect those elements, but too many competing directions may make the cockpit look fragmented.
Choose a primary reference line before finalizing a pattern. The boat’s centerline, main fore-and-aft walkway, or longest cockpit edge can provide that reference. Continue the direction deliberately across neighboring fixed panels and hatch lids. Where the geometry changes, use a border or planned break rather than letting the pattern rotate accidentally.
Contrast also affects how clearly people can see hatches, steps, and changes in level. A dark surface may look different under a bimini than it does in open sun, while a light surface may interact strongly with pale upholstery. Review an accurate sample or rendering in several areas of the boat. Color preference matters, but legibility and visual order should be part of the decision.
Template the actual boat, not the brochure
Model names and published dimensions are useful starting points, but they do not replace measurements from the individual boat. Production variation, previous repairs, added equipment, and owner modifications can change the usable deck shape. Even apparently symmetrical port and starboard areas should be checked independently.
- Clean and clear the deck for documentation. Remove movable gear so corners, hatch gaps, drains, and fittings are visible.
- Choose stable reference points. Mark the bow, stern, port, starboard, centerline, and pattern direction on every template.
- Template moving parts separately. Hatch lids, removable panels, and seat bases need their own labels and clearance checks.
- Record every cutout. Identify the purpose of drains, sockets, hinges, latches, and fasteners rather than drawing anonymous holes.
- Dry-check the full set aboard. Confirm gaps, alignment, hatch travel, and access before approving a final layout.
Follow the templating method required by the selected supplier or installer. If instructions are unclear, pause and verify them rather than adjusting a template by guesswork. Clear photos beside labeled templates can make remote review much more useful.
Plan separately for the swim platform and bow
The swim platform experiences a different routine from the sheltered cockpit. People board from the water, handle lines, and move around ladders or hardware. Preserve drains, ladder movement, access panels, and the full operation of any folding or telescoping components. Confirm that the selected flooring and installation approach are intended for that exact location.
The bow creates another distinct zone. Curved seating, narrow footwells, storage beneath cushions, and the center walkway can produce small or irregular panels. Check how passengers enter the bow through the windshield and where they naturally place their feet. Keep step boundaries readable and avoid covering labels, fittings, or service access.
A design can remain coordinated without forcing identical panel shapes in all three zones. Consistent color, border logic, and pattern direction often create a stronger result than trying to make the bow, cockpit, and swim platform look like one unbroken sheet.
Evaluate cleaning and future access before ordering
Consider what is likely to land on the deck: lake water, sand, leaves, food, sunscreen, fishing residue, or watersports gear. Ask for product-specific cleaning instructions and confirm how the boat manufacturer recommends caring for adjacent surfaces. Test a cleaner only when the applicable instructions allow it, and begin in an inconspicuous area.
Layout affects cleanup. Keep drainage paths open, avoid trapping debris around hardware, and preserve the gaps required for lids and removable components. After installation, inspect edges, seams, drains, and access points regularly according to the applicable guidance.
Future service matters too. A technician may need to reach wiring, pumps, fuel-system components, or steering equipment. Document what lies beneath each covered panel and retain the final layout file with the boat’s records. A neat deck should remain understandable years after the initial project.
A practical bowrider flooring checklist
- List the boat’s primary activities and busiest walking routes.
- Define coverage for the cockpit, bow, steps, and swim platform separately.
- Photograph and label all hatches, drains, fittings, and service points.
- Compare exact product specifications, backing, compatibility, and care guidance.
- Review color and texture in sun, shade, and normal viewing distance.
- Align pattern direction to a stable reference line.
- Template the individual boat and dry-check every panel.
- Confirm the current installation instructions and commercial terms before ordering.
Frequently asked questions
Should a bowrider use the same flooring in the bow and cockpit?
It can, but the decision should reflect the substrate, geometry, drainage, access, and instructions for each zone. Coordinated color and pattern can connect separate areas even when their panel layouts differ.
Can flooring be placed over storage lids?
That depends on the lid, required clearances, substrate, hardware, and the selected flooring system. Template moving lids separately, preserve latches and hinges, and confirm full travel before installation.
How do I choose between a subtle and bold pattern?
View the design at full-deck scale and in the boat’s normal lighting. Consider the upholstery, hull color, hardware, hatch visibility, and the direction of major walking routes. A pattern should support the cockpit’s structure rather than obscure it.
What should I send when asking about flooring options?
Provide the boat model, clear deck photos, substrate information, intended coverage, labeled measurements or templates, typical use, access constraints, and preferred visual direction. Ask which current specifications and instructions apply to the exact option being discussed.
Practical takeaway
The best bowrider flooring choice begins with the boat’s real layout and routine. Map the movement zones, preserve access, compare exact products, and approve templates only after checking them aboard. A thoughtful plan balances appearance with drainage, serviceability, cleaning, and clear movement through the cockpit.
Focean can join that planning conversation. Contact Focean with deck photos, substrate details, labeled templates, intended use, and design preferences to discuss current flooring options and verify the exact specifications, compatibility guidance, installation instructions, care requirements, and terms for your project.
Share:
Custom Boat Flooring for Shallow-Water Fishing Boats: A Layout Guide
How to Clean Bass Boat Flooring Around a Casting Deck