
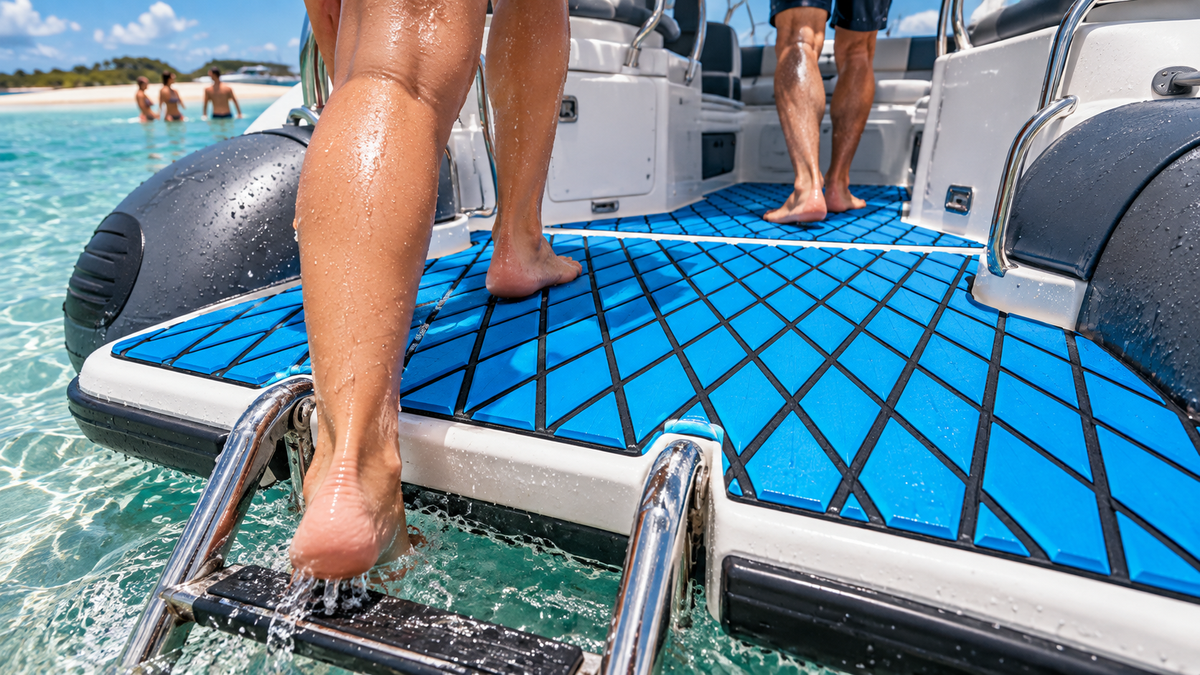
Install RIB Tender Flooring Around Tube Edges and Hardware
Installing sheet flooring in a rigid inflatable boat is not simply a matter of tracing the visible deck. A RIB tender combines a rigid floor with inflatable tube bases, a compact console or seat, drains, lifting points, removable equipment, stern hardware, and a short route from the boarding ladder into the cockpit. Each feature changes where a panel can end and what must remain accessible.
This guide focuses on the planning and dry-fitting decisions that come before final placement. It helps you document the exact tender, divide the deck into workable zones, build full-size templates, and verify every moving or serviceable part. Always follow the current instructions for your exact boat, flooring, adhesive system, and hardware.
Confirm the rigid deck before planning any panel
Begin by identifying the surface that can actually receive flooring. Do not assume every area inside the tubes is one continuous deck. A tender may have molded sections, removable panels, access covers, seams, fasteners, textured surfaces, drainage channels, or repair areas. Record each material and transition separately.
Inspect the tube-to-deck junction without pushing a template beneath the inflatable tube or covering a bonded seam. Note where the tube changes shape as it meets the transom, console, or bow locker. If you cannot identify a surface or understand whether it must remain uncovered, stop and consult the boat maker or a qualified installer.
If you are still deciding what area is suitable, start with Focean's RIB tender flooring buyer's checklist. It explains how to separate the rigid floor from tube, service, and hardware zones before ordering material.
Make an access map before a design map
Create a simple overhead sketch of the tender. Mark the console, seat base, fuel or battery access, bow locker, drain, transom fittings, lifting points, tie-downs, ladder, removable tank or equipment, and every hatch or panel that opens. Add the direction each lid, seat, or fitting moves.
Next, walk the real route from the ladder or dock entry to the seat and console. Mark the first wet-foot landing, the turning point, and the places where passengers wait or gear is set down. The access map should explain how the boat works before decorative lines or panel shapes are considered.
Photograph the map and the uncovered deck from several fixed positions. Include a ruler or another reliable scale reference where useful. Give every planned zone a simple name so later templates, photographs, and cut pieces cannot be confused.
Set a deliberate boundary beside the tubes
The inner tube edge is usually curved and may vary from bow to stern. Treat it as a sequence of local curves rather than one smooth arc. Your template should stay on the eligible rigid surface and preserve the clearances required by the boat and flooring instructions.
Use short reference marks on the rigid deck or on removable masking material that is permitted for the surface. Do not mark, abrade, heat, puncture, or chemically treat the inflatable tube. Keep valves, handles, protective rubbing features, repair areas, and tube attachments unobstructed.
Check the boundary with the tender loaded in the normal way described by its maker. The goal is not to predict tube movement from memory, but to confirm that the proposed edge belongs to the rigid deck and does not interfere with any adjacent component.
Divide the installation into functional zones
A compact tender often works better as several coordinated panels than as one oversized shape. Useful zones may include the stern boarding landing, the central travel lane, the console footwell, the seat area, and the bow locker approach. The exact division should follow the boat's geometry and service needs.
Place panel boundaries where they can be inspected and where they do not cross drains, hatch gaps, fasteners, or moving hardware. Avoid a seam directly beneath a recurring pivot point or across a narrow wet-foot landing when another clear boundary is available. Keep the pattern direction consistent unless a deliberate change helps explain a separate zone.
Focean's RIB boarding-ladder flooring guide offers a detailed way to map handholds, first and second foot placement, gear routes, drainage, and helper positions around the stern landing.
Template console feet, seats, and hardware individually
Do not estimate around a console or seat base from its widest visible dimension. Trace each foot, flange, fastener group, and service opening as a separate detail. Decide whether the flooring should stop around the component or whether the component must be removed under an approved installation plan. Never loosen structural, fuel, electrical, steering, or safety-related hardware without the correct procedure and authority.
For fixed items, build the template outward from stable reference points. For removable items, record their installed position before moving them and confirm the full operating range after they return. Keep lifting eyes, tie-downs, drain plugs, inspection ports, hinges, latches, and access covers visible and usable.
If a fitting has an uncertain purpose, label it and exclude it from the panel until its function is confirmed. A clean-looking cutout is less important than preserving access to the boat's systems.
Build full-size templates with orientation marks
Use a template material that lies flat and can be trimmed without damaging the tender. Build one zone at a time. Add a centerline or another stable boat reference, bow and stern arrows, port and starboard labels, the panel name, and pattern direction. Mark every exclusion, drain, lid, fastener, and hardware edge.
Join large template sections securely enough that they do not shift during removal. Transfer curved edges with several reference points rather than forcing a flexible strip into a guessed shape. Reinstall the template after each major adjustment and confirm that its labels still match the boat.
A photograph alone is not a full-size template. Camera angle can distort distance, symmetry, and curvature. Use photographs as records and orientation aids, while the physical template carries the final geometry.
Transfer cautiously and cut in stages
Before transferring a template, confirm which face of the flooring will be visible and how the pattern should run. A mirrored transfer is an easy error on asymmetrical panels. Write orientation marks on the template and on any temporary protective backing, then compare them with the deck map.
Leave difficult curves and small hardware details for staged fitting. Make conservative cuts, return the piece to the tender, and refine only after checking the surrounding component. Follow the current cutting guidance for the exact material and use appropriate protective equipment and a stable work surface.
Keep every offcut and label until the entire dry fit passes. A small labeled piece can help explain a corner, pattern direction, or hardware clearance if a panel needs correction.
Dry-fit the complete tender before placement
Place every finished panel on the clean, unprepared deck without removing any backing or applying adhesive. Check the tube-side boundary, console and seat clearances, hatch movement, drain paths, lifting points, tie-downs, ladder movement, and transom hardware. Walk the dock-to-seat and water-to-seat routes with the tender safely secured.
Open every lid and access cover through its full range. Remove and replace portable equipment. Confirm that the seams and pattern remain understandable from bow, stern, and normal seated positions. If one panel forces another out of alignment, revise the system rather than trimming the final piece to hide the error.
Compare the planned surface with the decision factors in Focean's RIB cockpit material comparison, especially service access, seams, care, and future repair boundaries.
Prepare and place only from exact current instructions
Surface preparation and placement depend on the exact boat surface and flooring system. Use only the cleaners, tools, environmental conditions, timing, pressure, and sequence specified by the current instructions. Do not substitute a general online method for product-specific guidance.
Work in a sequence that preserves your reference marks and exit route. Keep each panel labeled until its position is certain. Avoid blocking access to drains, hardware, or a part needed to complete the next zone. If the instructions, substrate condition, or installation environment are unclear, pause before placement.
Run a final function and care check
After the installation has completed every required step, repeat the same access test used during dry fitting. Operate hatches, seats, ladder components, removable equipment, drains, lifting points, and tie-downs. Inspect all edges in good light and compare the result with the panel map.
Save the templates, panel names, orientation photographs, exact product information, and installation notes. They will make future inspection or local repair easier. For routine ownership planning, Focean's RIB flooring care guide explains how to clean in zones while keeping tube edges, drains, and access points visible.
FAQ
Should flooring touch the inflatable tube?
Do not assume that it should. Keep the planned panel on the confirmed rigid surface and follow the boat and flooring instructions for the required boundary. Preserve tube seams, attachments, valves, repair areas, and inspection access.
Can one panel cover the whole RIB tender deck?
Only if the exact geometry, access requirements, material instructions, and complete dry fit support it. Separate functional panels may be easier to orient around curves, moving lids, drains, console feet, and stern hardware.
Can I make the template from photos and model information?
Use those as references, not as a substitute for documenting the actual tender. Variations, installed equipment, repairs, and camera distortion can change the usable deck geometry. Full-size oriented templates should be checked on the boat before cutting.
Practical takeaway
A reliable RIB tender installation begins with access, not decoration. Confirm the rigid deck, map every moving and serviceable part, set a deliberate tube-side boundary, divide the floor into functional zones, template each detail, and complete a whole-boat dry fit before placement. Review Focean's current collection for exact-item information, then contact Focean with clear deck photos, boat details, and product-specific questions when you need current guidance.
Share:
How to Clean Bowrider Boat Flooring After a Beach Day
Traction-Focused Cabin Cruiser Flooring Around Cockpit Steps