
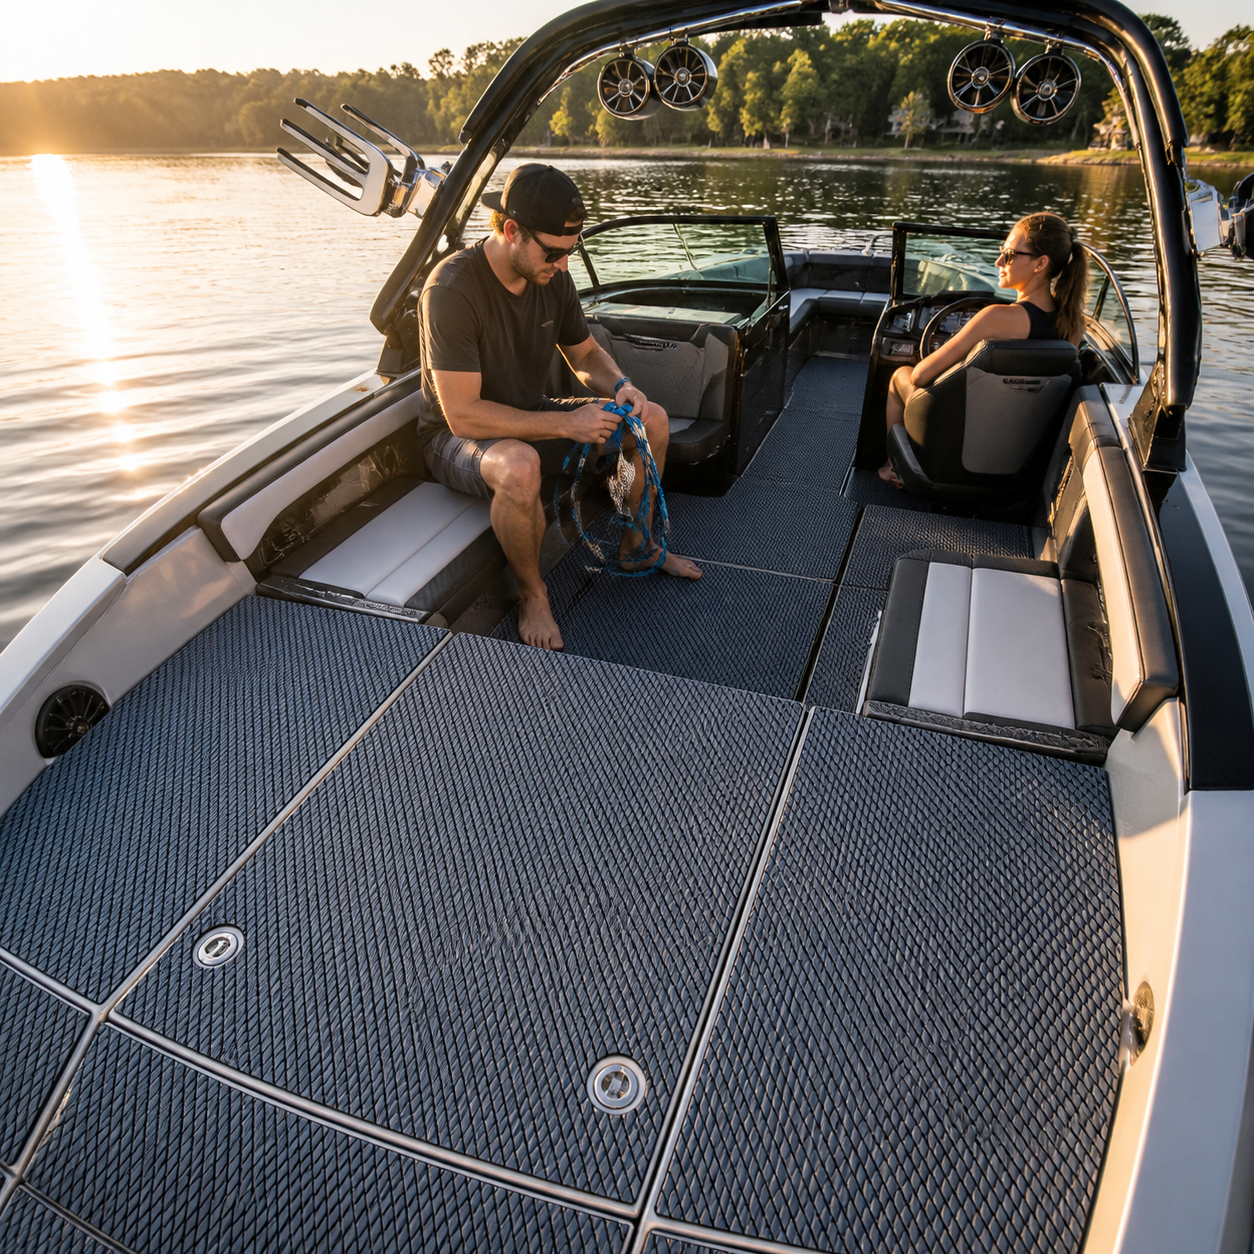
Wake boats ask a lot from a cockpit floor. Riders move between the helm, lounge seats, storage lockers, and stern throughout the day. Wet tow ropes cross the traffic lane. Boards and vests come aboard in quick succession. Someone may be standing to spot a rider while another person reaches for gear. A comfortable flooring plan therefore involves more than choosing a color or pattern. It should support the way people actually move, pause, carry equipment, and clean up.
This guide explains how to plan comfortable wake boat flooring around real cockpit use. It focuses on layout, surface feel, seams, hatches, drainage, and maintenance without assuming that one material or design suits every boat. Before ordering, confirm the dimensions, backing, surface, installation instructions, and current terms for the exact flooring option you are considering.
Start with movement, not the catalog
The best starting point is a normal day on your boat. Imagine the sequence from launch to retrieval. People step aboard, place bags under seats, walk toward the helm, move aft when a rider enters the water, and return through the cockpit carrying wet gear. These repeated routes form the deck's working map.
Walk the boat and mark four kinds of zones:
- Primary traffic lanes: the route between the boarding point, cockpit, helm, and stern.
- Standing zones: places where the driver, observer, or gear handler spends time on their feet.
- Access zones: hatches, coolers, batteries, pumps, drains, and other areas that must remain reachable.
- Gear zones: places where boards, ropes, vests, shoes, and bags are set down or moved.
A floor can look cohesive while still respecting these different jobs. The goal is to avoid decorative choices that interrupt movement or make service points harder to use.
What “comfortable” should mean on a wake boat
Comfort is not one measurement. It is the combined experience of standing at the helm, kneeling near a locker, stepping aboard with wet feet, and walking across the cockpit when the boat is in motion. A shopper should evaluate several qualities separately rather than relying on a single label.
Standing feel
Think about where people remain upright for longer periods. The helm and observer area matter, but so do the stern passage and the spot where someone manages a tow rope. Compare flooring samples or product details for firmness, cushioning, texture, and how the surface feels through the footwear normally used aboard. A soft first impression is not the only consideration; the material also needs to feel stable under ordinary movement.
Texture and changing conditions
A textured surface may help support traction-focused deck planning, but no texture removes the need for careful movement. Water, sunscreen, loose debris, wear, footwear, and cleaning residue can all affect footing. Keep the deck clear, address spills, and use handholds where the boat provides them. Treat flooring as one part of cockpit management, not as a universal safety solution.
Temperature and exposure
Color and sun exposure can influence how a deck feels during the day. Ask for information that applies to the exact color and surface you are considering, and evaluate a sample in conditions similar to your boat when possible. Shade from a tower or cover can create a different experience from a fully exposed stern, so one cockpit may contain several exposure zones.
Plan the stern-to-helm traffic lane
On many wake boats, the stern is the busiest transition area. Riders return from the water, step across a platform or rear entry, and move forward with water and equipment. Map this route before deciding where panel seams and decorative borders should sit.
A clear visual flow can make the cockpit easier to read. Long lines may guide the eye fore and aft, while a restrained pattern can help separate the main walkway from seating bases and storage areas. Whatever design you prefer, avoid placing a visually busy junction exactly where people turn, set down boards, or step over a threshold.
Check the narrowest parts of the route. Seat corners, cooler handles, tower supports, and open locker lids can change the usable width. Photograph the boat with these items in their normal positions. That record is more useful than an empty-deck photo because it shows where feet and gear must actually pass.
Keep hatches and service access practical
Wake boat cockpits often include multiple storage lids and service openings. Flooring should not disguise where a hatch begins or interfere with its movement. When planning templates, identify every hinge, latch, pull, fastener, drain, and removable panel. Open each hatch fully and note where its edge travels.
Panel lines can follow hatch outlines to preserve access and create a deliberate appearance. Leave the clearances required by the boat and flooring instructions; do not guess around moving parts. Small bridges of material between closely spaced cutouts may be difficult to align or maintain, so discuss those areas before finalizing a layout.
Service access also matters after installation. A battery compartment or pump cover may be opened only occasionally, but it still needs to lift without tearing an edge or trapping a panel. Take close-up photos and label each opening in your template set.
Coordinate flooring with gear storage
Comfort improves when the deck remains uncluttered. Flooring cannot solve poor storage, but the planning process can expose it. Note where tow ropes are coiled, where boards rest while riders switch, and where wet vests are dropped. If those items repeatedly occupy the main traffic lane, adjust the storage routine before finalizing the deck design.
Protect the floor from sharp fins, exposed hardware, and heavy items that can shift. Use the boat's intended racks and compartments. If a portable cooler or bag stays in one place, check how it is restrained and whether its base may collect grit. Lift movable items during cleaning so debris does not remain underneath.
Respect drainage and cleanup
A wake boat deck regularly receives drips from riders, ropes, and equipment. The flooring layout should preserve the boat's intended drainage path. Locate scuppers, channels, low points, and removable drain covers before making templates. Do not cover an opening or assume that water will find another route.
Cleaning effort is part of comfort because a cockpit that is difficult to maintain creates more work after every outing. Compare how patterns, seams, and panel edges relate to the path of dirty water. A highly detailed design may require more attention around grooves and junctions. That does not make it unsuitable, but the maintenance tradeoff should be understood in advance.
Use the care instructions for the exact product. A cautious default is to remove hard debris, use controlled fresh water, clean with compatible products and soft tools, rinse residue, and let the cockpit dry before covering. Avoid directing concentrated pressure at seams or edges.
Create accurate templates without rushing
Template quality affects fit, alignment, and access. Work on a clean, dry deck and divide the cockpit into manageable sections. Mark a fixed orientation on every piece, along with nearby hardware and the direction of any pattern. Record reference measurements instead of relying only on photos.
Before committing to a final layout:
- Confirm that every hatch opens through its full range.
- Check clearances around hinges, latches, seat bases, and tower supports.
- Verify that drains and service covers remain accessible.
- Stand in the helm, observer, and stern work zones to review seam placement.
- Lay boards, ropes, and common bags in their usual locations and inspect the traffic lane.
- Compare the finished template against the product's current installation requirements.
If the deck has compound curves, unusual transitions, damaged surfaces, or an uncertain substrate, pause and seek product-specific guidance. A careful planning stage is easier to revise than cut material.
Choose a visual design that supports the cockpit
Wake boats already contain strong visual elements: upholstery panels, towers, speakers, consoles, and contrasting hull colors. Flooring can connect those elements without competing with all of them. Start with the largest fixed colors, then decide whether the floor should blend in or provide controlled contrast.
Use borders and pattern changes selectively. They work best when they reinforce real geometry, such as a hatch group, central walkway, or stern transition. Too many isolated accents can make a compact cockpit feel fragmented. Preview the design on a top-down photo and on an eye-level view from the stern; each reveals different problems.
A practical pre-order checklist
- Photograph the cockpit with seats, lockers, and common gear in use.
- Map boarding, walking, standing, and gear-handling zones.
- Identify every hatch, hinge, latch, drain, and service cover.
- Confirm the substrate and its condition.
- Compare exact product information for surface, backing, compatibility, care, and installation.
- Review color and texture in lighting similar to the boat's normal environment.
- Test the template with all access points open.
- Plan where wet ropes, boards, vests, shoes, and bags will go.
FAQ about comfortable wake boat flooring
Should the entire cockpit use one continuous pattern?
Not necessarily. A continuous pattern can create visual flow, while carefully placed borders or direction changes can clarify hatches and zones. The right choice depends on the cockpit geometry and the ability to maintain accurate alignment across separate panels.
Where should seams go?
Place seams with access, movement, drainage, and panel geometry in mind. Avoid treating seam placement as decoration alone. Review the exact installation instructions and do not bridge moving hatches or service covers.
Can textured flooring prevent slips?
Do not assume that texture prevents slips. Water, contaminants, wear, footwear, and cleaning residue affect traction, so keep the cockpit clear and move carefully.
How can I compare comfort before ordering?
Review current product details, compare the firmness and texture of available samples when feasible, and think about the boat's actual standing and traffic zones. Contact Focean to ask whether samples are currently available; do not assume availability.
Practical takeaway
Comfortable wake boat flooring begins with an accurate map of how the cockpit works. Prioritize the stern-to-helm traffic lane, standing zones, hatch access, drainage, and gear storage. Then choose texture, color, and pattern around those needs. The result should be easier to understand, move through, inspect, and maintain—not merely attractive in an empty-boat photograph.
When you are ready to compare options, document the cockpit from several angles and verify the exact product details for your boat. Contact Focean with photos, measurements, substrate information, and access points to discuss current flooring options and ask whether samples are available.
Share:
EVA Foam vs. Marine Vinyl for Center-Console Boat Decks
RIB Boat Flooring in Changing Weather: A Practical Planning Guide